
 ultimate-guide
Interior Painting Near Me: What to Expect in 2026
Table of Contents
- How to Find Interior Painting Contractors Near You
- Average Cost to Paint a Room (And What Drives It Up)
- Interior Painting Preparation Checklist for Homeowners
- How to Choose Paint Finishes for Every Room
- What to Expect From a Professional Interior Painting Process
- DIY vs. Hiring Interior Painting Pros: Which Makes Sense?
- Frequently Asked Questions
Last Updated: September 30, 2026
How to Find Interior Painting Contractors Near You
Searching for interior painting near me returns a wall of lead-generation directories that rank on ad spend rather than workmanship. This guide from Always Pro Painters covers what separates a crew worth hiring from one that leaves you repainting in eighteen months: verify credentials before you compare quotes, because a low bid from an uninsured crew is a liability transfer, not a discount.
Checking Licenses, Insurance, and Reviews
Start with paperwork, not price. A legitimate painting contractor carries general liability insurance and workers' compensation coverage, and can produce certificates on request. Ask for both, then call the insurer to confirm the policy is active.
Average Cost to Paint a Room (And What Drives It Up)
The average cost to paint a room depends on square footage, ceiling height, wall condition, and prep needs. Because every project differs, Always Pro Painters provides a free estimate rather than a flat rate, based on scope of work, wall condition, and finish.
Four factors move the number most:
- Square footage and ceiling height. Tall ceilings and stairwells need scaffolding and more labor hours.
- Surface condition. Cracked drywall, peeling paint, and water stains require patching and priming first.
- Trim and molding. Detailed millwork and built-ins take longer to mask and cut in than flat walls.
- Paint quality and finish. Higher-sheen finishes and specialty coatings cost more per gallon.
Interior Painting Preparation Checklist for Homeowners
An interior painting preparation checklist protects your furniture and your timeline. Complete these before the crew arrives:
- Remove wall art, hardware, and outlet covers
- Move furniture to the center of each room or into another space
- Clear countertops and shelving in kitchens and bathrooms
- Confirm the crew will mask floors, trim, and fixtures
- Ask how drywall repair and sanding dust will be contained
- Set aside a staging area for paint and equipment
- Agree on daily start and finish times
How to Choose Paint Finishes for Every Room
Knowing how to choose paint finishes comes down to traffic, moisture, and light. Finish determines durability and how much wall texture shows through.
| Finish | Best For | Durability | Sheen Level |
|---|---|---|---|
| Flat | Ceilings, low-traffic bedrooms | Low | None |
| Matte | Living rooms, dining rooms | Medium | Very low |
| Eggshell | Hallways, family rooms | High | Low |
| Satin | Kitchens, bathrooms, trim | High | Medium |
| Semi-gloss | Doors, cabinets, molding | Very high | High |
| Gloss | Accent trim, furniture | Highest | Highest |
What to Expect From a Professional Interior Painting Process
A professional interior painting process follows a fixed sequence: protect, prepare, prime, paint, inspect. Skipping any stage shows up within a year, as peeling over patched drywall, flashing on color changes, or bleeding trim lines. What competitors skip is how long each stage takes and what good looks like.
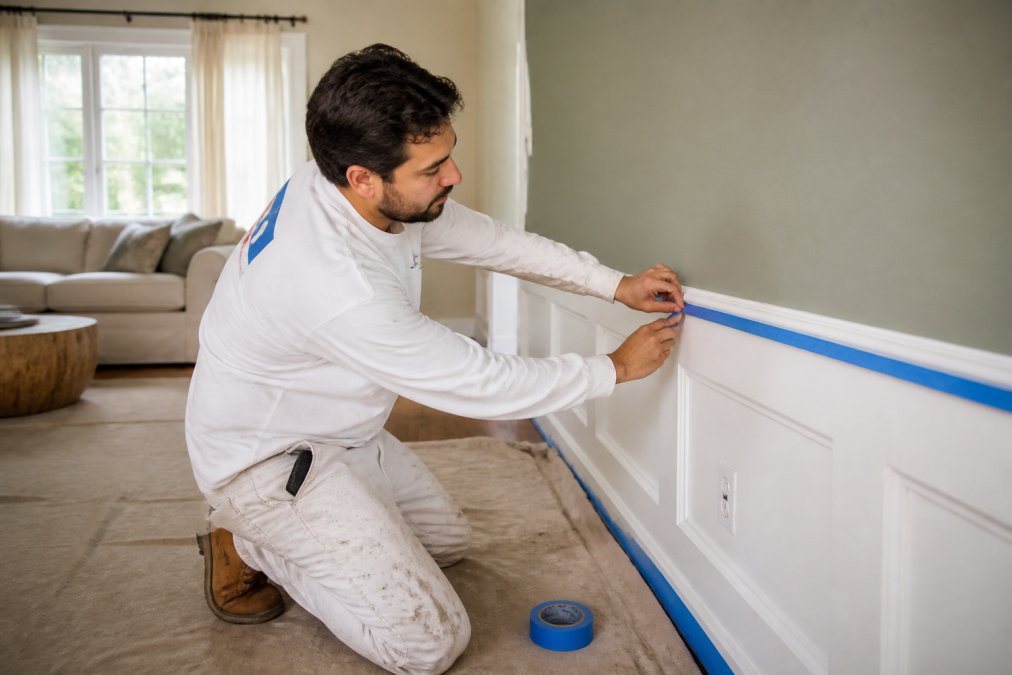
Stage 1, Protect (1-3 hours per home)
Floors get rosin paper or canvas drop cloths over plastic sheeting; furniture is clustered and covered; outlet covers, switch plates, and hardware go into labeled bags; HVAC returns get filtered or taped. If a crew starts rolling within an hour of arrival, they skipped this stage.
Stage 2, Prepare (the stage that decides the outcome)
This is where 60-70% of a quality job's labor lives, and where cheap bids quietly disappear. A meticulous crew:
- Patches nail holes, dents, and cracks with lightweight spackle or setting compound, then sands smooth.
- Caulks gaps where trim meets wall, where crown meets ceiling, and around casings, caulk, not paint, makes trim lines look sharp.
- Sands glossy surfaces and feathered edges so primer and paint can bond.
- Cleans kitchen and bathroom walls with a degreaser; cooking residue and soap scum cause paint to crawl and peel.
- Masks trim, windows, and fixtures, and lays containment to keep sanding dust out of HVAC returns.
Stage 3, Prime (not optional on repairs or color changes)
Primer is a bonding and blocking layer, not a cheap first coat. Bare drywall, patched areas, and any wall going from dark to light needs a primer coat. Stain-blocking primer is required over water stains, smoke residue, and marker or crayon, without it, the stain bleeds through within weeks. "Spot priming" only the patches leaves visible flashing under the new paint on a full color change.
Stage 4, Paint (cut in, then roll)
Edges get cut in first with a brush, then walls are rolled in overlapping W or M passes to keep a wet edge and avoid lap marks. Two coats is standard for a color change; one coat is only defensible when the new color matches the old and the existing paint is in good condition. Ceilings are painted before walls so drips land on surfaces that will be repainted anyway.
Stage 5, Inspect and touch up
A professional walkthrough happens under the room's actual lighting, daylight for living spaces, task lighting for kitchens and baths, because flaws that vanish under a work light show up at 7 a.m. Look for brush marks in cut lines, roller stipple where a smooth finish was promised, missed caulk gaps, and paint on hardware or floors. Touch-ups should be done before final payment, not "next week."
Realistic timelines
- Single standard room: 1-2 days including prep, two coats, and dry time.
- Three to four rooms: 3-5 days, assuming minimal drywall repair.
- Full-home interior: 1-2 weeks; longer with cabinets, stairwells, or extensive drywall repair.
- Cabinet refinishing: 4-7 days, since doors and drawers are removed, sprayed off-site or in a garage, and cured before reinstallation.
Always Pro Painters builds its process around exactly this order, from drywall repair through cabinet refinishing, and closes with a final walkthrough so every detail meets your expectations before the crew packs up.
DIY vs. Hiring Interior Painting Pros: Which Makes Sense?
DIY saves the labor line on the invoice but rarely saves money once you price the tools, time, and rework. The honest math below is the part most directory sites skip.
The real cost of a DIY room
A single 12x12 room with 8-foot ceilings is roughly 400 square feet of wall plus ceiling. A DIY run typically needs:
- 2 gallons of wall paint and 1 gallon of ceiling paint (more if the color change is dramatic)
- Primer for patches and any dark-to-light change
- Roller frames, nap covers, angled sash brushes, a 2.5-inch cut brush, and a quality edger
- Painter's tape, plastic sheeting, drop cloths, sanding sponges, spackle, caulk, and a caulk gun
- A pole sander or sanding block, and a step ladder
When DIY genuinely wins
- One small room in good condition, standard 8-foot ceilings, no repairs
- A refresh in the same color family, where one coat may cover
- A rental or garage where perfect trim lines are not the goal
When hiring a pro wins
- Multi-room refreshes where consistency across rooms matters
- Any project with cracked, water-damaged, or previously patched drywall
- Stairwells, vaulted ceilings, and two-story foyers that need scaffolding
- Cabinet refinishing, which requires spraying and curing that DIY setups rarely match
- Pre-sale timelines, where crews run rooms in parallel and compress the schedule
Where DIY reliably fails
Paint over a damp patch, an unprimed water stain, or a glossy surface peels within months. Rushed caulk shrinks and cracks along trim. Cutting in without taping on textured walls leaves wavy lines no touch-up fixes. These are prep problems, not skill problems, and prep is the stage DIY timelines squeeze.
Eco-friendly and low-VOC paint: the decision DIYers and pros face differently
Interior paint off-gasses volatile organic compounds (VOCs) as it cures, which is why "paint smell" lingers for days. Low-VOC and zero-VOC formulations reduce that load, which matters most in nurseries, bedrooms, and homes with asthma or chemical sensitivity concerns. The trade-offs are real:
- Coverage. Some zero-VOC lines cover in two coats where a conventional premium paint covers in one, erasing the price advantage.
- Durability. Early low-VOC formulas scuffed easily; current premium lines have closed most of that gap, but budget low-VOC paints still underperform on scrubbability.
- Application. Low-VOC paints can dry faster, shortening the window for cutting a wet edge, a bigger problem for a solo DIYer than a two-person pro crew.
- Colorants. The base can be low-VOC while the tint is not. Ask whether the colorants are zero-VOC, not just the base.
Frequently Asked Questions
What is the average cost to paint an interior room?
Interior painting costs vary based on room size, ceiling height, prep work needed, and paint quality. Most contractors provide a free estimate after assessing square footage, wall condition, and the number of coats required. Always Pro Painters offers free estimates so you get an accurate number before committing. Request a quote to see pricing for your specific space.
What should I look for in a professional painting contractor?
Look for licensed and insured painters with verifiable customer reviews and a clear process for surface preparation. Ask whether they include drywall repair, priming, and a final walkthrough in their scope. A written contract with a project timeline protects you. Local pros who specialize in residential painting and offer a warranty on their work are a safer bet than the lowest bidder. Always Pro Painters provides detailed prep work and a final walkthrough to confirm the finish meets expectations.
How long does a professional interior paint job take?
A single room usually takes time for prep and drying, while a full-home interior refresh can vary depending on square footage, prep needs, and the number of colors. Drying time between coats adds to the schedule. Contractors working around business hours may extend the timeline to avoid disrupting your operations. Always Pro Painters builds the schedule around your timeline, whether you are prepping a home for sale or refreshing a condo with detailed trim work.
What is the difference between standard and premium paint finishes?
Standard finishes like flat and matte hide imperfections well but clean poorly. Premium finishes such as satin, semi-gloss, and high-gloss resist moisture and scrubbing, making them better for kitchens, bathrooms, and trim. The right choice depends on the room's function and traffic level. Higher-sheen paints cost more per gallon but last longer in high-use areas. Ask your contractor for a color consultation to match finish and color to each space before painting begins.