 how-to
Avoiding Paint Dust on Furniture: 7 Tips
Table of Contents
- How to Properly Prep Walls for Painting to Minimize Dust
- How to Contain Sanding Dust Before It Reaches Furniture
- Essential Painting Preparation Tools for Dust Control
- Protecting Furniture: Coverings, PPE, and Room Setup
- Managing Humidity, Static Charge, and Air Filtration
- Finishing Techniques That Keep Paint Dust Off Furniture
- Frequently Asked Questions
Last Updated: September 16, 2026
How to Properly Prep Walls for Painting to Minimize Dust
Paint dust is the enemy of a clean finish, and it starts long before the first brush stroke. Avoiding paint dust on furniture tips begins with proper wall preparation, and this guide from Always Pro Painters walks through the seven steps that keep sanding residue, airborne contaminants, and overspray off your furniture and cabinets.
The core principle is simple: control dust at the source rather than chase it after the fact.
Cleaning Walls Top-to-Bottom Before Sanding
Cleaning walls top-to-bottom before sanding removes loose particulate matter that would otherwise mix with sanding residue and double your cleanup work. Start at the ceiling line and work downward in overlapping passes. Use a degreasing solution on kitchen walls and any surface near cooking areas, since grease prevents paint adhesion and traps dust.
How to Contain Sanding Dust Before It Reaches Furniture
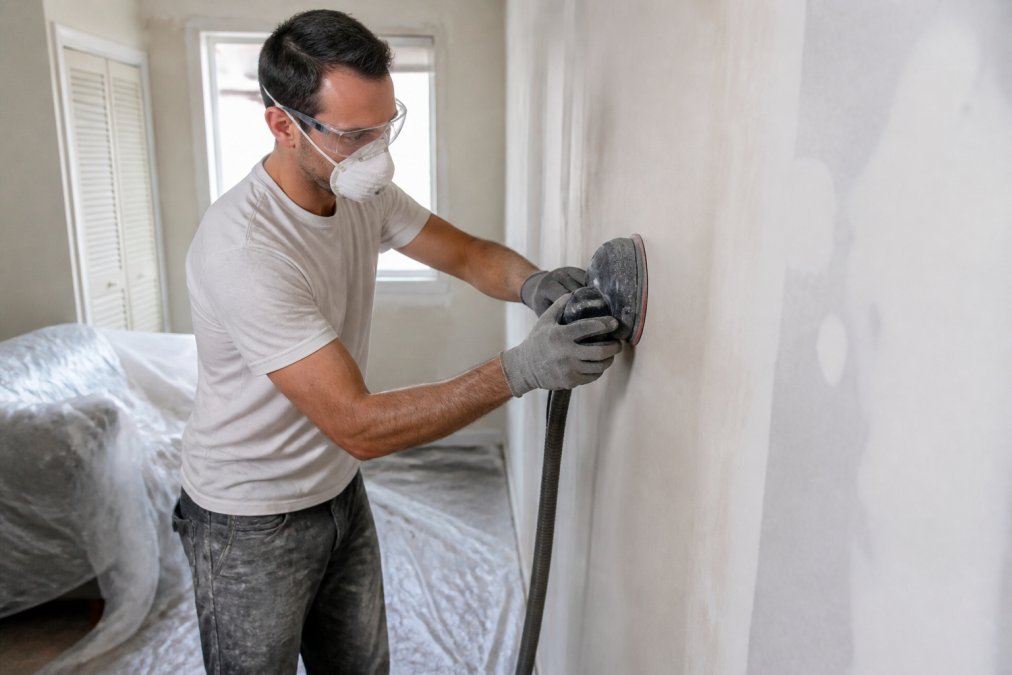
Containing sanding dust means sealing the work zone before you sand, not after. The most effective approach combines plastic sheeting barriers with negative air pressure. Tape plastic from ceiling to floor at every doorway, then place a box fan blowing outward in one window and a HEPA filter running inside the room.
- Seal HVAC vents and returns with plastic and tape before sanding begins
- Cover furniture with plastic sheeting, not drop cloths, since fabric lets fine dust pass through
- Sand with a vacuum attachment connected to the sander whenever the tool allows it
- Work in small sections and vacuum between each pass
Essential Painting Preparation Tools for Dust Control
The right tools separate a dusty job from a clean one. Three categories matter most: vacuum filtration, wiping materials, and containment supplies. Many businesses find that investing in proper filtration pays for itself in reduced cleanup time alone.
HEPA Vacuums and Vacuum Filtration Attachments
A HEPA vacuum is a vacuum equipped with a high-efficiency particulate air filter that traps fine dust rather than exhausting it back into the room. Use one with a hose attachment to vacuum walls, trim, and cabinet interiors after sanding. Vacuum filtration attachments connect directly to random orbital sanders and capture dust as it is generated.
Tack Cloths, Microfiber, and Lint-Free Wipes
Tack cloths are lightly tacky treated cloths that lift remaining dust particles from a surface before painting. Follow every tack cloth pass with a lint-free microfiber wipe dampened with water or a compatible solvent. This two-step sequence removes the tacky residue that tack cloths can leave behind, which would otherwise interfere with paint adhesion.
| Tool | Purpose | Best For |
|---|---|---|
| HEPA vacuum | Traps fine particulate matter | Post-sanding cleanup on all surfaces |
| Vacuum filtration attachment | Captures dust at the sander | Random orbital sanding |
| Tack cloth | Lifts residual dust particles | Final prep before primer |
| Microfiber wipe | Removes tack residue | After every tack cloth pass |
Protecting Furniture: Coverings, PPE, and Room Setup
Protecting furniture requires three layers of defense: physical coverings, personal protective equipment, and a room layout that keeps dust moving away from valuables. This is the step most DIY guides gloss over, and it is where finish quality is won or lost.
Managing Humidity, Static Charge, and Air Filtration
Humidity and static charge are directly linked, and this is the angle most guides miss entirely. When relative humidity drops, air becomes a poor conductor and triboelectric charge builds up on sanded surfaces, plastic sheeting, and even the painter's clothing. A statically charged cabinet face or wall panel will pull airborne dust out of the air and hold it against the surface, which is why dust problems get dramatically worse in heated shops during winter.
Why Relative Humidity Drives Dust Attraction
Static charge dissipates through moisture in the air. Below roughly 40 percent relative humidity, charge accumulates faster than it can bleed off, and fine sanding residue, which is light enough to stay airborne for hours, gets pulled toward any charged surface. Above roughly 60 percent, you trade static problems for slower dry times and a higher risk of blushing or trapped moisture in solvent finishes.
Grounding and Anti-Static Measures That Actually Work
Grounding is the most underused dust-control step in furniture finishing. Bond the workpiece to a known ground, a metal workbench leg, a grounded outlet screw, or a grounding strap clipped to the frame, so accumulated charge drains continuously instead of building until it snaps and pulls dust. Wipe plastic sheeting and containment barriers with an anti-static spray or a dilute fabric-softener solution before hanging them; untreated poly sheeting is one of the worst static generators in a shop.
Sizing Air Filtration to the Room
An ambient air cleaner running continuously during sanding and painting captures particles that escape your containment setup. Match the unit's cubic-feet-per-minute rating to the room volume: a common rule of thumb is to select a CFM rating that turns the room's air over at least four to six times per hour. For a 12-by-14-foot room with an 8-foot ceiling, about 1,344 cubic feet, that means roughly 90 to 135 CFM of actual delivered airflow.
The Curing Window by Paint Type
The dust-attraction window is not the same for every finish, and this is where most guides stop short. Water-based and acrylic paints typically skin over within 30 to 60 minutes under normal shop conditions, but they remain soft and dust-receptive for several hours after that. Oil-based paints and alkyds stay tacky far longer, often 6 to 12 hours, and a dust particle that lands during that window becomes a permanent nib.
Finishing Techniques That Keep Paint Dust Off Furniture
Finishing technique is where a clean prep job either pays off or gets wasted. The sequence matters more than any single product: sand, vacuum, tack, then coat, and repeat that cycle between every coat, not just the first one. Skipping the vacuum step and going straight to a tack cloth just smears fine dust into the surface instead of removing it.
Sanding Between Coats Without Recontaminating the Surface
Between coats, use a fine-grit abrasive, typically 320- to 400-grit for water-based finishes and 400- to 600-grit for solvent finishes, and sand lightly enough to knock down nibs without cutting through the previous coat. Wet-sanding with a lubricant reduces airborne dust dramatically, but it introduces water or solvent into the surface and requires a longer dry time before recoating. Dry-sanding with a vacuum-assisted sander is faster and keeps most residue out of the air, provided the vacuum is HEPA-filtered.
The Painter as a Dust Source
This is the gap most finishing guides skip entirely: the person doing the work is often the largest single source of contamination in the room. Loose cotton clothing sheds lint continuously. Fleece, wool, and any fabric with a nap release fibers with every movement. Synthetic knits generate static that pulls dust toward the painter and then releases it over the wet surface.
Applying the Final Coat in a Controlled Environment
For the final coat, work in the cleanest possible state: filtration running, containment still up, no foot traffic, and the surface freshly tacked. Apply thin coats rather than heavy ones, a heavy coat stays tacky longer and gives airborne dust a wider window to land. Spray application produces more overspray than brushing or rolling, so if you spray, increase filtration and give the room time to clear before the finish starts to set.
A Repeatable Final-Coat Checklist
- Confirm relative humidity is in the 40 to 50 percent range and the hygrometer reading is stable
- Run the ambient air cleaner for at least 30 minutes before applying the final coat
- Vacuum, tack, and microfiber-wipe the surface in that order
- Wear a clean disposable coverall, hood, and nitrile gloves
- Apply thin, even coats and avoid over-brushing, which kicks up dust from the surface
- Keep filtration running through the full curing window for the paint type in use
- Buff only after the finish has cured, not while it is still soft
Frequently Asked Questions
What is the best way to contain sanding dust before painting?
Seal doorways and air vents with plastic sheeting, then attach a HEPA vacuum to your sander or use a sanding block with a dust port. Work in small sections and wipe surfaces with a tack cloth between passes. This keeps paint dust from drifting onto furniture and other surfaces in the room.
Can air purifiers help reduce paint dust in a room?
Yes. A portable air purifier with a HEPA filter captures fine particulate matter that settles on furniture. Place it near your work zone and run it during sanding and painting. Pair it with an ambient air cleaner or box fan with a filter for better air exchange rate in larger rooms.
What materials are best for covering furniture during interior painting?
Plastic drop cloths work for short jobs but can trap dust underneath. Canvas drop cloths absorb overspray and stay in place better. For upholstered furniture, use plastic sheeting taped at the base, then drape a canvas cloth on top. Seal gaps with painter's tape to block dust from resettling.
How do I prevent dust nibs in a fresh paint finish?
Sand between coats with fine-grit paper, then wipe the surface with a tack cloth or lint-free microfiber. Keep the room's humidity steady and avoid running fans that stir up dust. Let each coat reach proper curing time before sanding. If dust nibs appear, buff them out with fine abrasive pads after the finish dries.
Dust control is the difference between a finish that looks professional and one that shows every flaw under raking light. Always Pro Painters builds every project around detailed surface preparation, from drywall repairs to cabinet refinishing, with clean lines and a solid finish as the standard. Our process includes a final walkthrough to confirm every detail meets your expectations. Get started with Always Pro Painters and a comprehensive property refresh built around the finish, not the rush.