 how-to
How to Choose Exterior Paint for Historic Homes
Table of Contents
- Start with Research, Not Paint Chips
- Historic House Exterior Paint Colors: Match the Period, Not the Trend
- Best Exterior Paint for Old Houses: Substrate and Compatibility
- How to Prepare Old Siding for Paint
- Historic Home Exterior Paint Finishes: Sheen by Surface
- Test Colors in Real Conditions Before You Commit
- Budget and Project Planning for Exterior Repainting
- Conclusion
- Frequently Asked Questions
Last Updated: October 14, 2026
Start with Research, Not Paint Chips
Learning how to choose exterior paint for historic homes starts with research, not a trip to the paint store. The color on a chip is not the color you will see on a 100-year-old facade.
The goal is not to make an old house look new, but to make it look right, understand what the house wore when it was built before deciding what it wears next.
Find the Original Colors
Original colors hide in plain sight under porch ceilings, behind shutters, inside window frames, and under siding edges where sunlight never reached.
Check these spots first:
- Window sashes and jambs
- Porch floorboards near the wall
- Shutter backs and hinges
You can also ask a local historical society or preservation office for period records. Some towns keep old building permits or paint records on file.
Check Historic Designation and Approval Rules
Some homes carry a historic designation that limits what you can change. Others sit in a local historic district with its own review board.
Before you buy a single gallon, confirm:
- Whether your home is individually designated
- Whether your district has design review rules
- Whether exterior color changes need approval
The Secretary of the Interior's Standards for Rehabilitation set the national baseline for preservation work. Many local boards follow them closely.
Historic House Exterior Paint Colors: Match the Period, Not the Trend
Historic house exterior paint colors should match the architectural period, not the current trend.
Start by identifying the architectural element hierarchy. Every historic facade breaks into five paintable zones, and each one gets its own color decision:
- Body, the dominant field color on siding or masonry
- Trim, fascia, corner boards, window casings, and banding
- Sash, the movable window frames and muntins, often painted darker than trim
- Porch and foundation, columns, railings, skirt boards, and water tables
- Accents, doors, shutters, and decorative brackets
Most period schemes used three to five colors across those zones. The body stays quiet, the trim defines edges, and the sash and doors carry the strongest contrast.
Here is how the major periods differ:
| Period | Body Color | Trim | Sash | Accent |
|---|---|---|---|---|
| Colonial | Deep reds, blues, yellows | White | Dark green or black | Dark shutters, red door |
| Victorian | Muted earth tones | Contrast trim | Dark sash | Bold door color, multi-hue detail |
| Craftsman | Earthy greens, browns | Cream | Dark green | Dark green or brown |
| Colonial Revival | Soft greys, tans | Off-white | Black or dark grey | Black or navy shutters |
Victorian homes often carried three or more colors, the "painted lady" look, while Craftsman homes used one or two muted colors that let the woodwork speak.
How to Find Your Home's Original Palette
Period tables give you a range; your house gives you the answer. Work through these sources:
- Paint archaeology. Scrape a small, inconspicuous area down to bare wood in layers; a paint analyst can read the stratigraphy under magnification and identify the original topcoat.
- Protected surfaces. Porch ceilings, the backs of shutters, window jambs, and the underside of siding courses often hold original color because they were never repainted or sun-bleached.
- Historic photographs. Black-and-white photos still show value contrast, how dark the trim was against the body. Historical societies, library archives, and county tax records sometimes hold period images.
Regional Color Mattered as Much as Period
Coastal towns leaned toward greys, blues, and weathered neutrals because salt air and sun faded pigments fast. Inland towns favored greens, browns, and ochres from local earth pigments, while industrial river towns used darker, soot-tolerant colors. Old photos of your street are your best inspiration.
Balance Accuracy With Preference
You do not have to reproduce the original scheme exactly. Hold the period's hue family and value relationships while shifting saturation or warmth to suit your taste, and keep the body-to-trim contrast ratio close to what the period used. That single rule preserves the historic read even when the exact colors change.
Best Exterior Paint for Old Houses: Substrate and Compatibility
The best exterior paint for old houses depends on what the house is made of. Old wood siding, masonry, and metal trim each need different products; the wrong one causes peeling, blistering, or trapped moisture. Most failures share one mechanism: historic materials need to move water vapor in and out, and a coating that seals the surface traps moisture until the paint lets go.
Match the paint to the substrate, and match the prep to the coating:
- Wood siding: 100% acrylic latex on previously painted wood; alkyd or oil-based primer on bare wood for stain blocking and grain penetration. Acrylic topcoats stay flexible and breathe.
- Masonry and brick: Breathable mineral or masonry paint, limewash, silicate, or a vapor-permeable acrylic masonry coating. Never a sealed film. Brick and mortar absorb and release moisture; a non-breathable coating traps it and spalls the face of the brick.
- Stucco: Same breathability rule as masonry. Patch with a compatible stucco mix, cure fully, then coat with a vapor-permeable product.
Why the Compatibility Rule Matters
Latex over old alkyd can fail, and alkyd over latex can too. The two chemistries expand and contract at different rates: a flexible acrylic topcoat on brittle alkyd shears and peels in sheets under seasonal movement, while an alkyd topcoat on latex lets solvent soften the latex underneath.
When in doubt, test a small patch and wait a full week. If the patch adheres, cures hard, and does not lift at the edges, the system is compatible.
Handling Previously Coated Masonry
Masonry is where most homeowners get into trouble. If brick or stone was painted with a non-breathable film and is now peeling or trapping moisture, the fix is not another coat on top:
- Remove loose and failed coating with the gentlest method that works, hand scraping, then low-pressure washing. Avoid abrasive blasting, which destroys the fired skin of historic brick.
- Let the masonry dry thoroughly. Moisture meters help confirm the wall is ready.
- Repoint any failed mortar with a lime-based mortar matched to the original, not modern Portland cement, which is harder than the brick and accelerates spalling.
- Coat with a breathable mineral product that lets the wall dry inward and outward.
Metal and the Rust Cycle
Metal trim, gutters, and porch roofs fail from the inside out once rust starts. Sand or wire-brush to bare metal, treat with a rust converter if pitting is present, spot-prime with a rust-inhibitive primer, and topcoat within the recoat window. Skipping the primer is the most common reason metal repaints fail within two seasons.
How to Prepare Old Siding for Paint
How to prepare old siding for paint is the step most homeowners rush, and the step that decides whether the finish lasts five or fifteen years.
Follow this order:
- Wash the surface. Remove dirt, chalk, and mildew with a mild detergent and a soft brush. Rinse well and let it dry fully.
- Scrape loose paint. Take off anything that lifts with a putty knife. Feather the edges so they blend.
- Sand rough spots. Smooth bare wood and feathered edges. Wipe away dust.
- Prime bare wood. Spot-prime every exposed area before the topcoat.
- Fill cracks and gaps. Use paintable caulk on joints, not on the siding face.
- Let everything cure. Give primer and caulk a full day before topcoating.
Lead Paint Safety and Surface Repairs
Homes built before 1978 likely contain lead paint. The EPA lead-safe renovation rules require certified contractors and safe work practices for these homes.
Never dry-scrape or power-sand lead paint. That spreads dust. Wet methods, plastic sheeting, and proper disposal keep everyone safe.
For repairs, address rot before painting. Soft wood holds no paint. Cut out and replace damaged boards, then prime the new wood before you topcoat.
Historic Home Exterior Paint Finishes: Sheen by Surface
Historic home exterior paint finishes should vary by surface, not stay flat across the whole house. Sheen controls how light hits each part of the facade. Getting it right adds depth.
Use this guide:
- Body and siding: Flat or matte
- Trim and fascia: Satin
- Doors: Satin or semi-gloss
Flat paint hides surface flaws on old siding, while satin and semi-gloss on trim and doors catch light and define edges, that contrast gives a historic home its crisp, period look.
Test Colors in Real Conditions Before You Commit
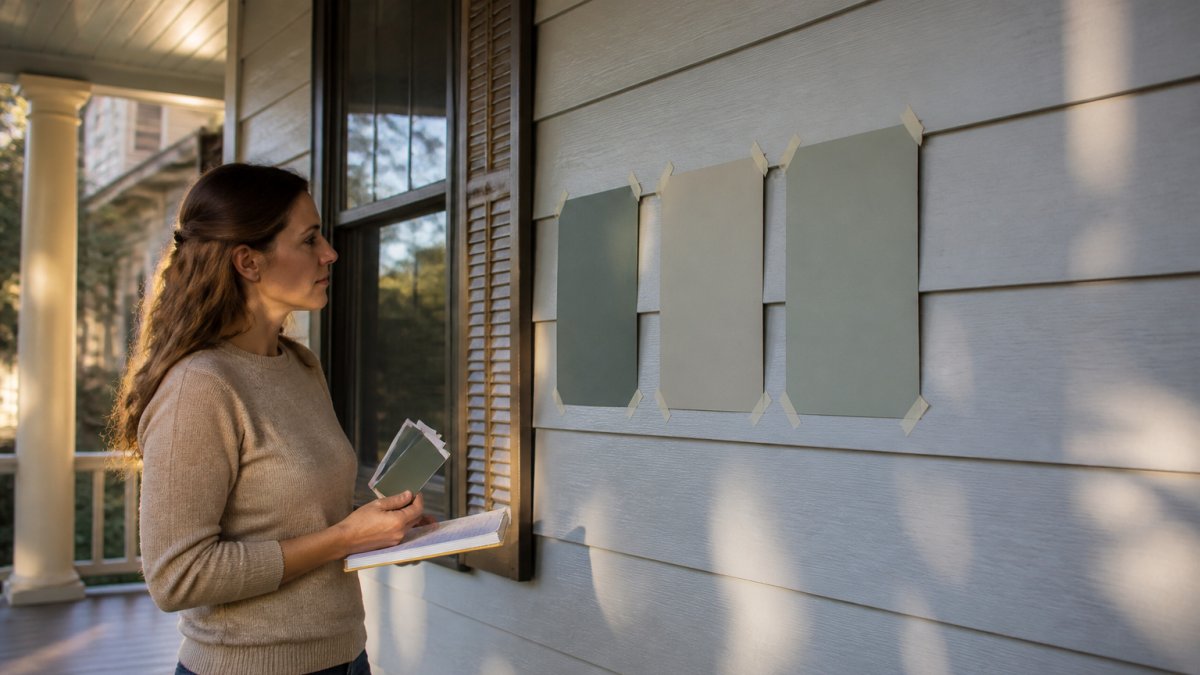
Always test colors on the house itself before you commit.
Here is how to test:
- Paint large swatches, at least two feet square, on two or three sides of the house.
- Include the trim color next to the body color so you see them together.
- Let the paint dry for a full day. Wet paint reads lighter than cured paint.
- Check the swatches at morning, midday, and evening light.
- Look at them again on a cloudy day.
Never judge a color from a small chip. Size changes everything. A color that works on a one-inch square can overwhelm a whole wall.
Budget and Project Planning for Exterior Repainting
Exterior repainting costs depend on size, condition, prep needs, and how much repair the siding requires. No two historic homes are the same.
Plan for these cost drivers:
- Square footage of paintable surface
- Amount of scraping, sanding, and repair
- Number of stories and access needs
Always build in a contingency. Old homes hide rot, failed caulk, and bad repairs under the paint.
Get a written estimate that lists prep steps, products, and the number of coats. Vague bids are a warning sign.
Conclusion
Choosing the right paint for a historic home takes research, testing, and patience. The color is the easy part; prep, substrate match, and approval rules make the finish last.
That is exactly where Always Pro Painters comes in. We start with detailed surface preparation for a clean foundation for paint, match products to your siding and trim, and finish with a final walkthrough to confirm every detail.
Get started with Always Pro Painters and a free estimate for your historic home exterior.
Frequently Asked Questions
What type of paint is best for a historic home's exterior?
For wood siding, an acrylic-latex exterior paint with a breathable finish works well because it allows moisture to escape rather than trapping it and causing peeling. For masonry, use a breathable mineral-based or masonry-specific coating. The best exterior paint for old houses depends on the substrate: what the siding is made of, its current condition, and whether any previous coatings are still bonded. A contractor can test adhesion before recommending a product.
How do I choose historically appropriate exterior paint colors?
Start by identifying your home's architectural period, then research the palettes common to that era. Many historic house exterior paint colors are muted, earth-derived tones with off-white trim rather than bright modern shades. Check for original paint layers in protected areas like under porch ceilings or behind shutters, and consult your local historical society for regional color guidance. Test large samples on the actual siding before committing.
Do I need approval before changing the exterior color of a historic home?
It depends on your home's designation. If your property is in a locally designated historic district or is individually landmarked, exterior color changes may require review by a preservation commission. Some districts regulate color directly; others only regulate materials and features. Contact your local preservation office before you buy paint. Getting approval first avoids repainting at your own expense.
How often should a historic home's exterior be repainted?
Wood siding on a historic home typically needs repainting every 7 to 10 years, though sun exposure, moisture, and prior prep quality all affect the timeline. Masonry may go longer. Watch for cracking, chalking, or peeling rather than following a fixed schedule. Proper preparation before the previous repaint is the biggest factor in how long the finish lasts.