 how-to
How to Prepare House for Exterior Painting Step by Step
Table of Contents
- Exterior Painting Prep Checklist: What You Need Before You Start
- How to Clean Siding Before Painting
- How to Scrape and Sand Exterior Paint
- How to Repair Siding Before Painting
- Protect Windows, Doors, and Landscaping Before Exterior Painting
- Weather, Drying Times, and Surface Readiness for Exterior Painting
- Frequently Asked Questions
Last Updated: October 12, 2026
Exterior Painting Prep Checklist: What You Need Before You Start
Preparation is the single biggest factor in how long an exterior paint job lasts. According to Paint Quality Institute guidance on exterior surface preparation, most premature paint failures trace back to poor prep, not bad paint.
Exterior painting prep means cleaning, scraping, sanding, repairing, and protecting a house's outside surfaces before primer or paint goes on. Skip a step and the finish peels within a season or two; do it right and the coating holds up for years.
| Step | Task | Typical Time | Why It Matters |
|---|---|---|---|
| 1 | Inspect surfaces | 1-2 hours | Finds damage before you paint over it |
| 2 | Pressure wash | 2-4 hours | Removes dirt, mold, and mildew |
| 3 | Scrape loose paint | 3-6 hours | Stops new paint from peeling |
| 4 | Sand rough edges | 2-4 hours | Creates a surface paint can grip |
| 5 | Repair cracks and holes | 2-5 hours | Fixes damage and blocks moisture |
| 6 | Trim vegetation | 1-2 hours | Clears space to work and dry |
| 7 | Mask windows and trim | 2-3 hours | Protects glass, doors, and fixtures |
| 8 | Check weather and dry time | Ongoing | Prevents wash-off and poor adhesion |
How to Clean Siding Before Painting
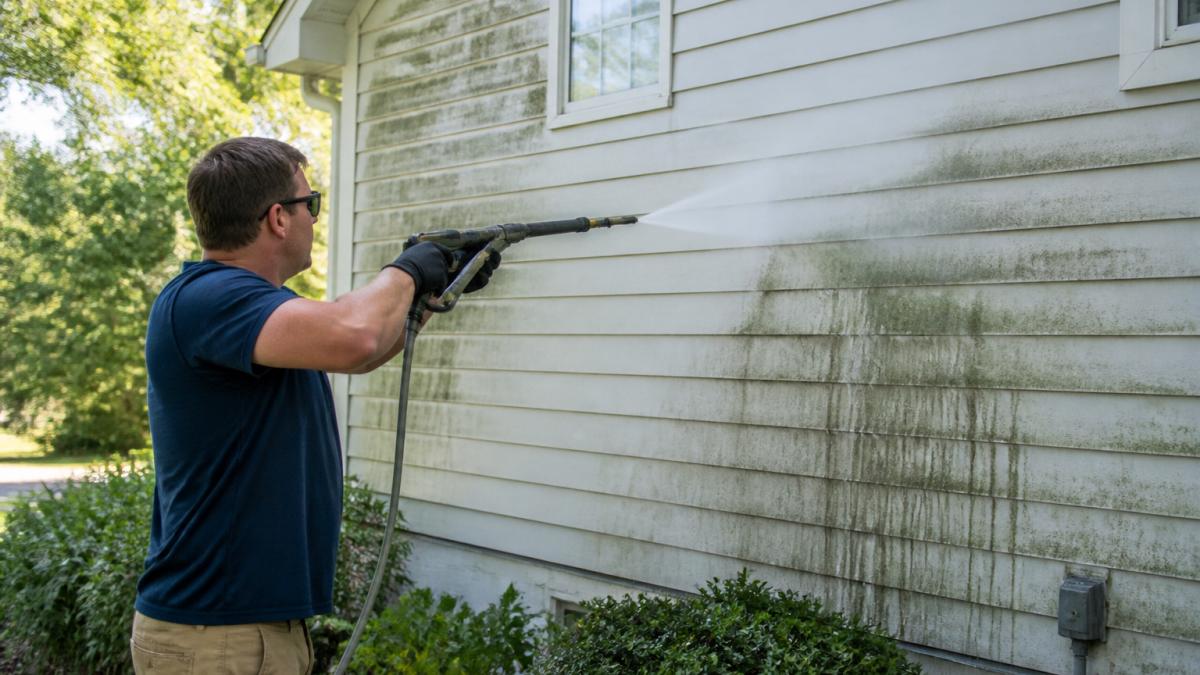
Cleaning is the first real prep step, and it decides whether paint sticks. A clean surface gives paint something to bond to; a dirty one causes peeling, blistering, and uneven color. The right method depends on your siding material, the wrong approach can gouge wood, force water behind vinyl, or etch fiber cement.
Wood Siding
Wood is the most forgiving to clean but the most vulnerable to water damage. Use a pressure washer at 1,200-1,500 PSI with a 25-degree nozzle, keeping the tip at least 12 inches away. Work top to bottom, one wall at a time, with the spray angled down so water runs off rather than seeping behind boards. For mildew, scrub with 1 part household bleach to 3 parts water, let it sit 10-15 minutes, then rinse.
Vinyl Siding
Vinyl is the easiest to clean but the easiest to damage. Use a pressure washer at no more than 1,200 PSI with a 40-degree nozzle, or a garden hose with a soft-bristle brush. High pressure forces water behind the panels, causing hidden rot. Wash with mild detergent, scrub mildew with diluted bleach, and rinse well. Vinyl usually dries in 24 hours, but check the weep holes at the bottom of each panel for trapped water.
Fiber Cement Siding
Fiber cement is durable but porous. Use a pressure washer at 1,500-2,000 PSI with a 25-degree nozzle, or a garden hose and brush for lighter dirt. Avoid holding the spray in one spot, fiber cement can absorb water and swell. For mildew, scrub with a bleach-and-water solution, rinse, and let dry 24-48 hours. Factory-finished fiber cement needs less prep than bare wood, but bare or chipped areas still need priming.
Masonry and Stucco
Masonry and stucco are porous and hold dirt deep in the surface. Use a pressure washer at 1,500-2,000 PSI with a 25-degree nozzle, working in small sections so the surface does not dry before you rinse. For stubborn mildew, use a bleach solution and a stiff brush. Inspect for hairline cracks while cleaning, stucco cracks trap water and need patching before painting.
Metal Siding and Trim
Metal siding and trim need the gentlest approach. Use a garden hose and a soft brush with mild detergent, pressure washing forces water into seams and causes rust. For rust spots, scrub with a wire brush, then treat with a rust-inhibiting primer before painting. Metal usually dries in 24 hours, but check seams and edges for trapped water.
Mildew: The Step Most Homeowners Skip
Mildew is not just dirt, it is a living organism that grows back through new paint if you only rinse it. Scrub mildew spots with 1 part household bleach to 3 parts water, let it sit 10-15 minutes, then rinse thoroughly.
How to Know the Surface Is Dry
Do not guess. Press a paper towel against the siding in several spots, if it comes away damp, wait another day. For wood and masonry, a moisture meter is the most reliable check: readings above 12-15% mean the surface is not ready for primer. For vinyl and metal, a visual check and the paper towel test are enough.
How to Scrape and Sand Exterior Paint
Scraping and sanding remove failing paint and give the surface a texture new paint can grip. This is the step rushed jobs skip, and it is why paint peels a year later.
Start with a putty knife or paint scraper. Push it under loose, peeling, or chipping paint and work it off in the direction of the grain. Do not dig into sound paint that is still bonded to the wood.
- Use an orbital sander with an 80-grit sanding disc for flat areas
- Use a grinder for tough spots and heavy buildup
- Hand-sand tight corners and detailed trim
- Wipe off all dust before priming
Dust is the enemy here. If you leave sanding dust on the surface, primer will not bond. Wipe every wall down, then let it dry before moving on.
How to Repair Siding Before Painting
Repairs fix the damage that cleaning and scraping expose. Paint hides nothing, it highlights every crack, hole, and soft board underneath. The most common mistake is treating the symptom instead of the cause: a recurring crack, a spreading soft spot, or paint that bubbles within a year all point to a problem behind the surface. Diagnose the damage first, then repair it correctly for your siding material.
Step 1: Diagnose the Damage Before You Patch
Before you reach for caulk or filler, figure out what you are looking at. Probe suspicious spots with a screwdriver, if the tool sinks in easily, the wood is rotten and needs replacing, not filling.
Look for these patterns:
- Hairline cracks that reappear after patching: Usually caused by movement in the substrate, not just surface damage. The repair needs to flex with the siding, so use a flexible exterior caulk rather than a rigid filler.
- Bubbling or blistering paint: Often a sign of moisture escaping from inside the wall. Check for leaks around windows, doors, and roof lines before you paint over it.
- Water stains or dark streaks: Point to water intrusion behind the siding. Fix the source, a failed flashing, a clogged gutter, or a cracked caulk joint, or the repair fails again.
- Soft, spongy wood: Rot. Cut it out and replace it. Paint will not save rotten wood.
- Loose or moving boards: Re-nail or re-secure them so they do not move under the new paint. Movement cracks the paint film and lets water in.
If you find widespread rot or multiple leaks, the problem is bigger than paint prep. A professional inspection can tell you whether the damage is cosmetic or structural.
Step 2: Repair by Siding Material
Different materials fail in different ways and need different repair approaches.
Wood Siding
Wood is the most repair-friendly material but also the most vulnerable to rot.
Fiber Cement Siding
Fiber cement is durable but brittle.
Vinyl Siding
Vinyl siding is difficult to patch invisibly.
Stucco and Masonry
Stucco and masonry cracks need a flexible patching material: masonry patching compound for hairline cracks, stucco patch for larger areas.
Metal Siding and Trim
Metal repairs are mostly about rust.
Step 3: Check the Source of the Damage
Every repair should start with a simple question: what caused this? Water stains or bubbling often point to a leak behind the siding. Fix the cause, not just the surface, or the repair fails again. Common culprits:
- Failed caulk around windows and doors
- Clogged or leaking gutters
- Cracked flashing on the roof
- Sprinklers hitting the siding
- Poor drainage at the foundation
If you cannot find the source, a professional can help, painting over an active leak wastes time and money.
Step 4: Let Repairs Cure Before Priming
Caulk, filler, and patching compounds need time to cure before primer goes on. Follow the label, most exterior caulks need 24 hours, and some patching compounds need 48 hours or more. Prime too soon and the primer traps solvent, failing the patch. Press on the repair: if it feels soft or tacky, wait another day.
Protect Windows, Doors, and Landscaping Before Exterior Painting
Masking protects everything you do not want painted, saving hours of cleanup. Cover glass, door hardware, light fixtures, and outlets with painter's tape and plastic sheeting.
- Tape window glass and frames
- Cover door handles, hinges, and locks
- Wrap light fixtures and outlets
- Lay tarps below each wall
- Tie back or cover vegetation
Trimming vegetation away from the house does double duty: it clears space to work and lets the siding dry. Branches touching the wall trap moisture, which caused much of the damage you just repaired.
Weather, Drying Times, and Surface Readiness for Exterior Painting
Weather decides when you can paint, and getting it wrong wastes the whole job. Most exterior paints want temperatures between 50°F and 85°F, with low humidity and no rain in the forecast for at least 24 hours. Check your product label, since limits vary.
Drying times stack up across the whole project:
- After washing: 24 to 48 hours before scraping
- After repairs: follow the caulk or filler label, often 24 hours
- After priming: often 24 hours before the first coat
- Between paint coats: usually 4 to 24 hours
Before you prime, run a readiness check:
- Surface is fully dry to the touch
- All loose paint is gone
- Edges are sanded smooth
- Cracks and holes are filled
- Dust is wiped off
- Windows, doors, and fixtures are masked
- Forecast shows no rain for 24 hours
If any box is unchecked, wait. A rushed prep shows up as peeling paint within a season.
Exterior painting prep is a lot of work, and it is the part most homeowners underestimate. We build a clean foundation for paint through detailed surface preparation, protect your windows, doors, and landscaping, and finish with a walkthrough to confirm every detail meets your expectations.
Frequently Asked Questions
What should you do before painting the exterior of a house?
Before painting, you need to clean the exterior walls thoroughly, scrape and sand any loose or peeling paint, repair cracks and holes, and protect windows, doors, and landscaping with plastic sheeting and tarps. Check the weather forecast and make sure surfaces are completely dry before you prime or paint. Skipping these exterior painting preparation steps leads to poor paint adhesion and a finish that fails within a few seasons.
Do you need to prime the exterior of a house before painting?
Priming is necessary when you are painting bare wood, patched areas, or surfaces that had heavy paint removal. Primer seals the surface and helps paint adhere evenly. If the existing paint is in good condition and you are using the same color, a primer may not be needed on those sections. Always prime repaired spots and bare substrate before applying the topcoat for a uniform finish.
How long should exterior surfaces dry after washing before painting?
After pressure washing or cleaning, let the siding dry for at least 24 to 48 hours, depending on humidity and temperature. Wood siding may need longer. Test by pressing a paper towel against the surface. If it comes away damp, wait. Painting over moisture traps water under the film and causes peeling and blistering within months, undoing all your exterior painting prep work.
How do you repair peeling paint and damaged siding before painting?
Scrape all loose and chipping paint down to bare wood or a sound edge, then sand the edges smooth with an orbital sander and 80-grit sanding disc. Fill cracks and holes with exterior-grade caulk or wood filler. For rotted sections, replace the board. Once repairs cure, spot-prime bare areas. This how to repair siding before painting step ensures the new coating bonds to a stable surface.