 ultimate-guide
Best Way to Paint Kitchen Cabinets: 2026 Guide
Table of Contents
- What You'll Need: Cabinet Painting Tools List
- Step 1: Identify Your Cabinet Material and Prep the Workspace
- Step 2: Clean, Degrease, and Sand Every Surface
- Best Primer for Kitchen Cabinets
- Best Paint Finish for Kitchen Cabinets
- Step 3: Apply Paint to Kitchen Cabinets the Right Way
- How Long Does It Take to Paint Kitchen Cabinets?
- Common Mistakes That Ruin a Cabinet Painting Project
Last Updated: August 22, 2026
The best way to paint kitchen cabinets is not a weekend shortcut, it's a disciplined sequence of preparation, priming, and application that separates a finish lasting a decade from one that chips within months. At Always Pro Painters, we've seen every variation of this project, and the difference between a professional result and a costly redo almost always comes down to what happens before the brush ever touches wood.
Surface preparation is where most DIY cabinet painting projects fail. Skipping or rushing the cleaning, sanding, and priming stages leads to peeling, brush marks, and adhesion failure regardless of how expensive the topcoat is.
What You'll Need: Cabinet Painting Tools List
A complete cabinet painting tools list before you start saves two trips to the hardware store and one ruined finish.
Application Tools by Method
| Method | Primary Tool | Best For | Finish Quality |
|---|---|---|---|
| Brush | Angled sash brush (2-2.5 in.) | Detail work, tight spaces | Good with practice |
| Roller | High-density foam roller, 4 in. | Cabinet boxes, flat surfaces | Smooth, minimal texture |
| HVLP Sprayer | Wagner FLEXiO 5000 or HomeRight Super Finish Max | Doors, drawer fronts | Professional, factory-like |
| Airless Sprayer | Graco Magnum X5 | Large projects, fast coverage | Excellent, steeper learning curve |
For most homeowners, the combination of a high-density foam roller on cabinet boxes and an HVLP sprayer on doors and drawer fronts produces the best balance of quality and control.
Prep and Safety Supplies
- Drop cloths for floors and countertops
- Painter's tape for masking edges
- Tack cloth for dust removal before each coat
- Respirator rated for VOC vapors (not just a dust mask)
- Nitrile gloves
- Sanding block and grit sandpaper: 120-grit, 150-grit, 220-grit
- Sanding sponges for contoured surfaces
- Wood filler for dents and gaps
- Degreaser or trisodium phosphate solution
- Microfiber cloths
- Paint pyramids to elevate doors during painting and drying
- Screwdriver and labeled zip-lock bags for cabinet hardware
Ventilation is non-negotiable. Open windows, run a fan exhausting air outward, and wear your respirator throughout sanding and spraying. The EPA guidance on indoor air quality and VOC exposure outlines why solvent-based and even some waterborne coatings require active airflow during application.
Step 1: Identify Your Cabinet Material and Prep the Workspace
The cabinet material determines which primer adheres, whether you need a grain filler, and how aggressively you can sand.
How to Identify Cabinet Material
Solid wood cabinets have visible grain, feel heavy, and may show knots. They accept most primers and paints well but benefit from grain filler for a smooth finish.
MDF (medium-density fiberboard) is smooth and highly porous on cut edges, which absorb primer aggressively. Use a shellac-based primer like Zinsser B-I-N on MDF edges to prevent swelling.
Thermofoil cabinets have a vinyl wrap over MDF. Paint adhesion is poor without a deglosser and a bonding primer.
Laminate cabinets require scuff sanding with 150-grit sandpaper and a bonding primer. Standard latex paint will not stick without this prep.
Removing Cabinet Doors, Drawer Fronts, and Hardware
Remove all cabinet doors, drawer fronts, and cabinet hardware before painting. Number each door and its corresponding opening with painter's tape on the inside face to prevent alignment issues during reassembly. Place cabinet hardware, hinges, and pulls in labeled zip-lock bags with their screws. Lay doors flat on paint pyramids or sawhorses in your workspace. Painting with doors in place produces drips at hinge points, missed coverage in corners, and finish inconsistencies.
Step 2: Clean, Degrease, and Sand Every Surface
Kitchen cabinets accumulate years of grease, cooking vapor, and cleaning product residue. Paint applied over contamination will not bond. This is the single most skipped step in DIY cabinet painting, and it's the one that causes the most failures.
Choosing a Degreaser and Cleaning Method
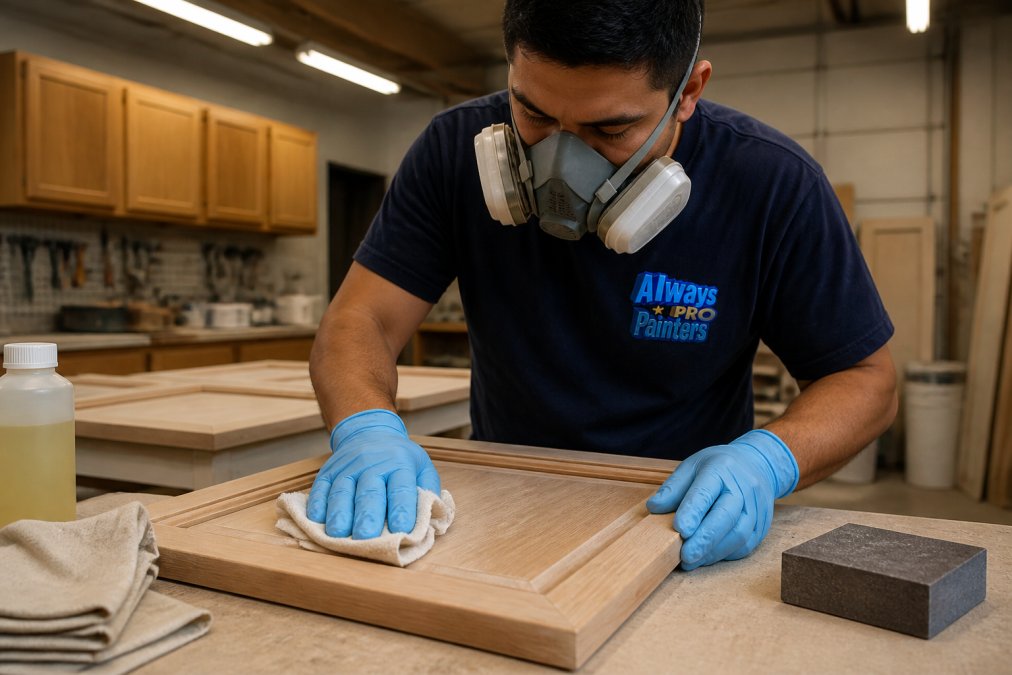
Trisodium phosphate (TSP) or a TSP substitute is the standard for heavy grease. Mix according to package directions, apply with a sponge, scrub thoroughly, and rinse with clean water. Allow surfaces to dry completely before sanding. For lighter buildup, a dedicated degreaser spray works well. A deglosser (liquid sander) can substitute for light sanding on very glossy surfaces, but it does not replace mechanical sanding for proper primer adhesion on most cabinet materials.
Sanding Techniques and Grit Selection
Sanding creates mechanical tooth for primer adhesion and levels minor surface imperfections before they get locked under a topcoat. Use 120-grit sandpaper on a sanding block to remove old finish and scuff laminate or thermofoil surfaces. Use 150-grit for general scuff sanding on previously painted surfaces in good condition, and 220-grit for light sanding between coats. Always sand with the grain on solid wood. On MDF and laminate, use consistent, even pressure without bearing down hard. After sanding, remove all dust with a tack cloth, not a dry rag.
Best Primer for Kitchen Cabinets
The best primer for kitchen cabinets depends on the cabinet material and the condition of the existing surface. Primer adhesion is the foundation of finish durability.
Shellac-based primer (Zinsser B-I-N): The strongest option for stain blocking, odor sealing, and adhesion to difficult surfaces including glossy finishes and MDF edges. It dries to the touch in about 20 minutes. Use this on cabinets with water stains, smoke damage, or severe grease penetration.
Water-based bonding primer (KILZ 2 All-Purpose): A practical, widely available choice for cabinets in reasonable condition. It dries in about 30 minutes and blocks medium stains effectively.
Urethane-modified primer: Some premium cabinet paints include a matched primer formulated for their topcoat chemistry. When available, use the manufacturer's recommended primer.
Apply primer in thin, even coats. Two thin coats outperform one heavy coat every time. Sand lightly with 220-grit between primer coats, wipe with a tack cloth, and allow full dry time before topcoat application.
Best Paint Finish for Kitchen Cabinets
The best paint finish for kitchen cabinets is a semi-gloss or satin enamel with a hard, washable cure. Flat and eggshell finishes are not appropriate for cabinetry; they absorb grease, scuff easily, and cannot be cleaned without damaging the surface.
Waterborne alkyd paints are the current professional standard. Products like Benjamin Moore ADVANCE and Sherwin-Williams Emerald Urethane Trim Enamel combine the flow and leveling characteristics of oil-based paint with water-based cleanup. They self-level to minimize brush marks and cure to a hard, furniture-quality finish.
- Benjamin Moore ADVANCE: Available in over 3,500 colors, low VOC even after tinting, and cures to a hard finish.
- Sherwin-Williams Emerald Urethane Trim Enamel: A water-based urethane modified alkyd specifically designed for cabinets, trim, and doors. It dries faster than ADVANCE and provides a self-leveling finish with low fumes.
Both products are premium-priced per gallon but outperform standard latex paints significantly in durability testing over 12-18 months of kitchen use.
Eco-Friendly and Low-VOC Paint Options
Low-VOC and zero-VOC cabinet paints have improved substantially. The waterborne alkyds listed above are already low-VOC by conventional standards. For homeowners prioritizing indoor air quality, General Finishes Water-Based Milk Paint is a self-sealing acrylic formula that requires no topcoat in many applications and carries a low environmental footprint. The EPA's Safer Choice program certifies paints and coatings that meet strict criteria for human health and environmental safety.
Step 3: Apply Paint to Kitchen Cabinets the Right Way
Proper application technique is where the quality gap between a DIY finish and a professional finish becomes visible. The prep work sets the ceiling; the application determines whether you reach it.
Brush vs. Roller vs. HVLP Sprayer: Cost and Quality Compared
| Method | Tool Cost | Finish Quality | Skill Required | Best Application |
|---|---|---|---|---|
| Angled sash brush | Low | Good (visible strokes possible) | Moderate | Detail areas, edges |
| High-density foam roller | Low | Very good (minimal texture) | Low | Cabinet boxes, flat panels |
| HVLP sprayer (HomeRight Super Finish Max) | Moderate | Excellent | Moderate | Doors, drawer fronts |
| HVLP sprayer (Wagner FLEXiO 5000) | Higher | Excellent | Moderate | Full cabinet projects |
| Airless sprayer (Graco Magnum X5) | High | Excellent | High | Large projects |
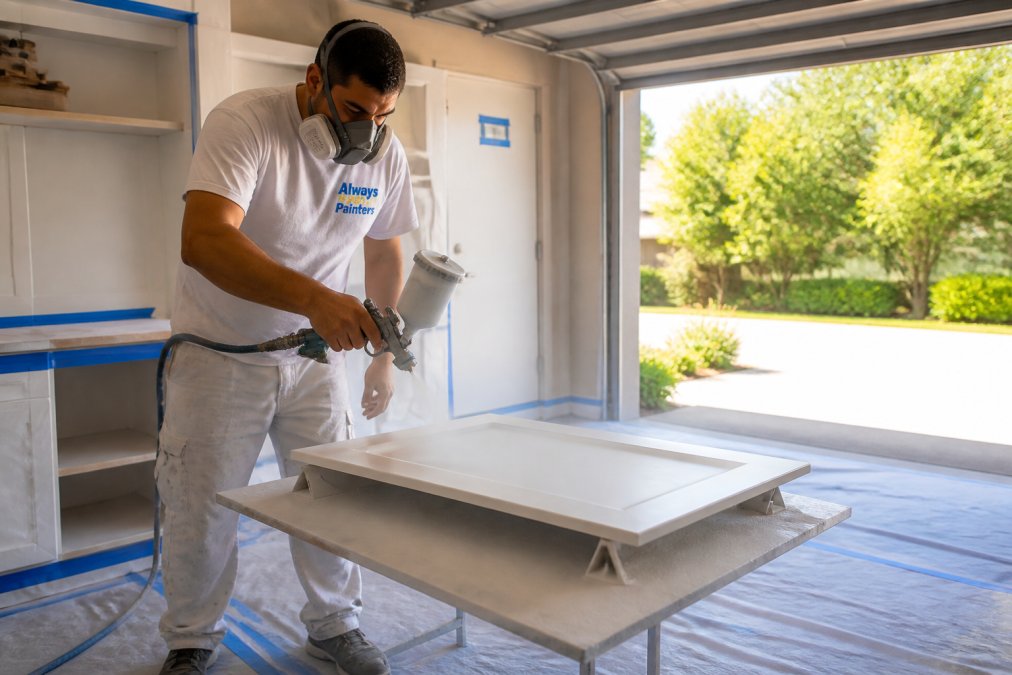
Professionals use a foam roller on the cabinet box and an HVLP sprayer on doors and drawer fronts laid flat on paint pyramids. When brushing, use an angled sash brush and apply paint in the direction of the grain or panel orientation. Finish each section with long, light strokes to lay off brush marks before the paint skins over.
Drying, Curing Times, and Reassembly
Drying time and curing time are not the same thing. Paint that is dry to the touch can still be soft enough to dent, scratch, or stick to itself during reassembly.
- Waterborne alkyds: Dry to touch in 1-2 hours; recoat after 2-4 hours; full cure takes 21-30 days
- Standard latex paint: Dry to touch in 1 hour; recoat after 2 hours; full cure in 7-14 days
- Shellac-based primer: Dry to touch in 20 minutes; recoat after 1 hour
Rehang cabinet doors only after a minimum of 24 hours dry time. Do not fully close doors for at least 72 hours; the paint on door edges and frame faces can bond together if pressed shut too soon. Handle painted surfaces with clean cotton gloves during reassembly to avoid fingerprint impressions.
How Long Does It Take to Paint Kitchen Cabinets?
Painting kitchen cabinets takes between 3 and 5 days for a typical kitchen, spread across multiple sessions to allow for proper drying between coats.
| Phase | Time Required |
|---|---|
| Removal, cleaning, and degreasing | 3-5 hours |
| Sanding and wood filler repair | 2-4 hours |
| First primer coat + dry time | 3-4 hours |
| Second primer coat + dry time | 3-4 hours |
| First paint coat + dry time | 4-6 hours |
| Second paint coat + dry time | 4-6 hours |
| Reassembly and hardware reinstallation | 2-3 hours |
Rushing this timeline is the most common cause of failed cabinet painting projects. Many homeowners compress a 4-day process into a single weekend, skipping dry times and applying topcoat over primer that hasn't fully cured.
Common Mistakes That Ruin a Cabinet Painting Project
Most cabinet painting failures trace back to a small set of repeatable errors.
Skipping degreasing. Grease and cooking vapor contamination prevent primer adhesion. No amount of sanding compensates for a contaminated surface.
Using the wrong primer. A standard drywall primer on kitchen cabinets will not provide adequate adhesion or stain blocking.
Applying paint too thick. Thick coats sag, run, and take far longer to cure. Two thin coats always outperform one heavy coat.
Not sanding between coats. A light pass with 220-grit sandpaper between coats removes dust nibs and improves topcoat adhesion.
Rehanging doors too soon. Partially cured paint on door edges and frame faces will bond together when doors are closed.
Painting in poor conditions. High humidity slows drying and can cause waterborne paints to blush or cloud. Ideal conditions are 50-70°F with humidity below 70% (the EPA).
Ignoring ventilation. Solvent-based products and even some waterborne alkyds release VOCs during application and drying. A respirator and active airflow protect both your health and the quality of the finish.
Cabinet refinishing done right is a multi-day, detail-intensive process, and the results depend almost entirely on what happens before the first coat of paint goes on. Always Pro Painters approaches every cabinet project with the same meticulous surface preparation, clean lines, and final walkthrough that define our residential and commercial work across the Chicago area. If you'd rather have the finish done correctly the first time, contact us for a free estimate and we'll assess your cabinets, recommend the right products for your material, and deliver a result built around the finish, not the rush.
Frequently Asked Questions
Is it better to paint kitchen cabinets with a roller or a sprayer?
An HVLP sprayer produces the smoothest finish with no brush marks, which is why professionals prefer it for cabinet doors and drawer fronts. A high-density foam roller is a solid second choice for the cabinet box and flat surfaces when spraying isn't practical. Brushes, specifically angled sash brushes, work best for edges and detail areas. For most DIYers, combining a foam roller with a brush gives good results without the overspray risk a sprayer carries.
Can I paint over kitchen cabinets without sanding?
Skipping sanding is one of the most common reasons cabinet paint peels within a year. A deglosser can reduce the need for heavy sanding on lightly finished surfaces, but it doesn't replace the adhesion that scuff-sanding creates. On glossy factory finishes or thermofoil, at minimum a light pass with 220-grit sandpaper is necessary. If you want to paint kitchen cabinets that actually hold up to daily use, surface preparation is the step you cannot cut short.
How long does a professional cabinet painting job typically last?
A professionally painted cabinet finish, done with proper degreasing, sanding, a bonding primer, and a waterborne alkyd or urethane enamel topcoat, typically lasts 8 to 15 years with normal kitchen use. Durability depends heavily on the paint type, the number of topcoats applied, and the curing time allowed before the cabinets are put back into service. Rushing the cure stage is the single biggest factor behind early chipping and peeling.
What should I know before starting a kitchen cabinet painting project?
The most important thing to understand is that prep work takes longer than painting. Expect to spend at least half your total project time on cleaning, degreasing, sanding, and priming. Cabinet material matters too: solid wood, MDF, and thermofoil each require a different primer and sanding approach. Budget for quality materials, since a premium waterborne alkyd or urethane enamel costs more upfront but delivers far better finish durability than standard latex paint.
This article was written using GrandRanker