 ultimate-guide
Interior Painting Tips for Beginners 2026: A Complete Guide
Table of Contents
- Essential Painting Tools for DIY Projects
- How to Choose Interior Paint Colors for 2026
- Surface Preparation: The Foundation of a Clean Finish
- How to Cut In Paint Like a Pro
- Interior Painting Tips for Beginners: Rolling and the W Technique
- Interior Painting Duration for a Room: What to Expect
- Troubleshooting Common Beginner Painting Mistakes
- Frequently Asked Questions
Last Updated: September 15, 2026
Essential Painting Tools for DIY Projects
A successful interior paint job starts with the right tools, not the most expensive ones. For beginners, a focused kit of quality basics beats a garage full of gadgets.
Here's what you actually need:
- Angled sash brush (2 to 2.5 inches) for cutting in clean edges
- Roller cover with a 3/8-inch nap for smooth walls, 1/2-inch for textured surfaces
- Extension pole to reach ceilings without a ladder
- Paint tray and liner for fast cleanup between coats
- Painter's tape and drop cloths to protect trim and floors
- Sanding block, spackle, and putty knife for surface repair
A common mistake is buying the cheapest roller cover available. Cheap covers shed lint into wet paint, which means picking fibers out of your finish for hours. A guide to choosing paint applicators from the American Coatings Association explains how nap length affects finish quality.
Always Pro Painters uses professional-grade tools on every job because the tool determines the finish. If you'd rather skip the trial and error, our team brings the right equipment and experience.
How to Choose Interior Paint Colors for 2026
Choosing interior paint colors starts with testing swatches on your actual walls, not picking from a screen. Sheen and lighting change how a color reads, so a shade that looks perfect online can turn muddy under your ceiling light.
Start With Light, Not the Color Chip
The most useful number on a paint label is Light Reflectance Value (LRV), a 0-100 scale showing how much light a color bounces back. Most major manufacturers print it on the chip or in their online color tools.
- LRV 70-100: Light, airy, makes small rooms feel larger. Good for hallways, basements, north-facing rooms.
- LRV 40-69: Mid-tones. The workhorse range for living rooms and bedrooms.
- LRV 0-39: Deep, moody, absorbs light. Best in rooms with strong natural light or as an accent wall.
Beginners often pick a color in a bright store and are shocked when it reads two shades darker on a north-facing wall. Checking LRV before buying a gallon prevents that surprise.
2026 Color Direction
The 2026 interior design trends lean toward warm neutrals, earthy greens, and soft clay tones. These shades adapt to changing light rather than fighting it. Look for palettes built around:
- Warm whites and creams with yellow or red undertones, not the cool gray-whites that dominated the late 2010s
- Muted sage and olive greens that read as neutral against wood and natural fiber
- Clay, terracotta, and warm taupe tones that pair with brass and unlacquered fixtures
- Deep, saturated accents (forest green, ink blue, oxblood) used on trim, cabinetry, or a single wall
Most major brands publish an annual Color of the Year and coordinating palette in late fall, so 2026 collections are already on the shelf. Pull two or three chips from the same brand's 2026 collection rather than mixing brands, since undertones are calibrated to work together within a line.
Test Swatches the Right Way
- Paint large swatches (at least 12 inches square) directly on the wall, not on poster board
- Apply two coats so the swatch reads like the finished wall
- View them at morning, afternoon, and evening light
- Test near trim and flooring, since those surfaces shift how a color reads
- Buy a sample pot before committing to a full gallon
What most guides miss is lighting temperature. North-facing rooms pull cool light, so warm undertones balance them. South-facing rooms flood with warm light, which can make yellows look brassy. East-facing rooms shift from cool morning to warm afternoon light, so a color can look completely different at 8 a.m. and 4 p.m.
Sheen Changes the Color
The same color in flat versus satin reads differently. Flat absorbs light and hides imperfections but scuffs easily. Satin and eggshell reflect more light, making the color look brighter and more saturated, and they clean up better in high-traffic areas. If you love a color in flat, expect it to look a touch deeper in satin.
Surface Preparation: The Foundation of a Clean Finish
Surface preparation determines whether your paint job lasts years or peels within months. Skipping prep is the biggest reason beginner paint jobs fail, and no premium paint covers a poorly prepared wall.
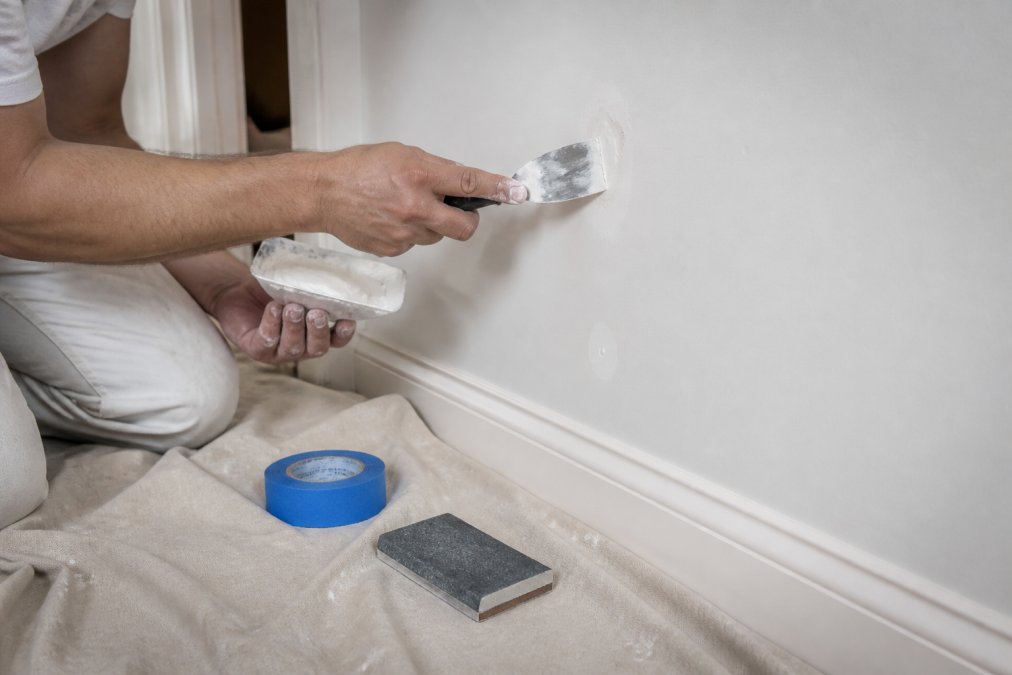
Start by clearing the room or pushing furniture to the center and covering it. Then work through these steps:
How to Cut In Paint Like a Pro
Here's the method:
Interior Painting Tips for Beginners: Rolling and the W Technique
Here's how it works:
Interior Painting Duration for a Room: What to Expect
The Real Timeline Is Coats, Not Hours
Here's a rough breakdown:
| Room Type | Prep Time | Painting Time | Total Duration |
|---|---|---|---|
| Small bedroom | 2-3 hours | 3-4 hours | 1 day |
| Standard bedroom | 3-4 hours | 4-5 hours | 1-2 days |
| Living room | 4-6 hours | 5-7 hours | 2 days |
| Kitchen (cabinets excluded) | 5-7 hours | 6-8 hours | 2-3 days |
Dry-to-Recoat vs. Full Cure
What Actually Stretches the Timeline
Curing Time Adds to the Timeline
Plan Around Your Life, Not Just the Clock
Troubleshooting Common Beginner Painting Mistakes
| Problem | Likely Cause | The Fix |
|---|---|---|
| Lap marks | Dry edge before blending | Work smaller sections, keep a wet edge |
| Paint peeling | Dirty or glossy surface | Wash, sand, and prime first |
| Visible brush strokes | Cheap brush or too little paint | Use a quality angled brush, load properly |
| Drips and runs | Too much paint on the tool | Tap off excess before applying |
| Patchy color | Skipped primer | Apply stain-blocking primer over repairs |
Frequently Asked Questions
What is the 80/20 rule in painting?
The 80/20 rule in painting suggests that 80% of a professional finish comes from preparation and 20% from the actual application of paint. For beginners, this means spending most of your time on surface preparation, including cleaning, sanding, patching, and taping. Rushing through prep leads to visible imperfections like lap marks, uneven texture, and peeling. Following interior painting tips for beginners that emphasize prep work will save you time on touch-ups and help you achieve a uniform, professional-looking result.
What are the expected color trends for interior paint in 2026?
For 2026, interior design trends lean toward warm, earthy neutrals like mushroom, clay, and soft terracotta, alongside muted greens and deep navy blues. Many homeowners are also choosing monochromatic schemes, painting walls, trim, and ceilings in tonal variations of the same hue. When selecting colors, test swatches on multiple walls and observe them under both natural and artificial light, since lighting considerations for color accuracy can dramatically shift how a paint sheen and hue appear throughout the day.
What should beginner painters start with?
Begin with a small, low-stakes space like a powder room, closet, or single accent wall. This lets you practice surface preparation, cutting in, and rolling without the pressure of a large room. Gather essential painting tools for DIY projects first: an angled sash brush, a lint-free roller, a paint tray with liner, painter's tape, drop cloths, a sanding block, and spackle. Starting small builds confidence and helps you learn how paint viscosity and drying time behave before tackling a full room.
What is the correct order to paint a room?
Paint the ceiling first, then the walls, then the trim, and finally the baseboards. This order lets you cover any drips or splatters from the ceiling onto the walls and from the walls onto the trim. Within each surface, cut in the edges with a brush before rolling the main field. If you are painting cabinets or doors, remove and paint them separately. Following this sequence prevents rework and keeps your clean lines intact from start to finish.
How do you achieve professional-grade paint finishes as a beginner?
Professional results come from careful surface preparation, the right tools, and proper technique. Sand and patch walls until smooth, apply a stain-blocking primer where needed, and use a lint-free roller for a uniform finish. Maintain a wet edge to avoid lap marks, and apply two thin coats rather than one thick coat. Choose the correct paint sheen for the room: eggshell or satin for walls, semi-gloss for trim. Let each coat cure fully before assessing the finish.
What surface preparation is necessary before painting interior walls?
Start by removing furniture and protecting floors with drop cloths. Clean walls to remove dust and grease, then fill nail holes and wall gouges with spackle. Sand the patched areas smooth with a sanding block, and wipe away dust. Apply painter's tape to baseboards, trim, and outlets. If the walls have stains or you are painting over a dark color, apply a stain-blocking primer. Skipping these steps leads to peeling, uneven texture, and visible brush strokes that undermine the final result.