 ultimate-guide
Painting Company With Detailed Prep Work: A 2026 Guide
Table of Contents
- Why Prep Work Defines a Painting Company's Quality
- Signs of Poor Paint Job Preparation (And How to Spot Them Early)
- Best Tools for Wall Surface Preparation Professionals Should Use
- Painting Contractor Prep Work Checklist: DIY vs. Pro Comparison
- How Long Does Professional Painting Prep Take?
- How to Choose a Painting Company With Detailed Prep Work Standards
- What Detailed Prep Work Costs You, and What Skipping It Costs More
- Conclusion
Last Updated: August 24, 2026
Why Prep Work Defines a Painting Company's Quality
The difference between a paint job that lasts six months and one that holds up for a decade comes down to surface preparation, not paint quality. At Always Pro Painters, prep work isn't preliminary, it's the job. The actual painting is the last 30% of the work. The other 70% is surface preparation, and that's where quality is either built or abandoned.
Most homeowners don't realize this until they're staring at peeling paint two years after a contractor promised a "professional finish." The contractor wasn't lying about paint quality. They just skipped the work that makes paint stick.
Surface Preparation vs. Paint Application: Where the Real Work Happens
Surface preparation is cleaning, repairing, and priming a substrate so paint bonds correctly and lasts as long as the product is rated. Paint applied over a poorly prepared substrate will fail, regardless of topcoat quality. Cracks that weren't patched will telegraph through the finish. Grease or dust left on a wall prevents adhesion. Moisture that wasn't tested for causes bubbling and blistering within months.
A painting company with detailed prep standards invests the majority of its time in preparation. That's the only version of "professional painting" worth paying for.
Signs of Poor Paint Job Preparation (And How to Spot Them Early)
Poor surface preparation leaves visible signs you can identify before a contractor finishes the job.
The most common signs of inadequate prep work include:
- Visible brush marks or roller texture caused by skipping sanding between coats
- Peeling or flaking paint near trim and corners, indicating failed adhesion from improper priming or degreasing
- Hairline cracks reappearing through fresh paint, meaning cracks were painted over rather than filled and cured
- Uneven sheen across a single wall from inconsistent priming or skipped primer on patched areas
- Paint pulling away at trim edges or outlets, a sign that tape was applied over dust or the surface wasn't cleaned before masking
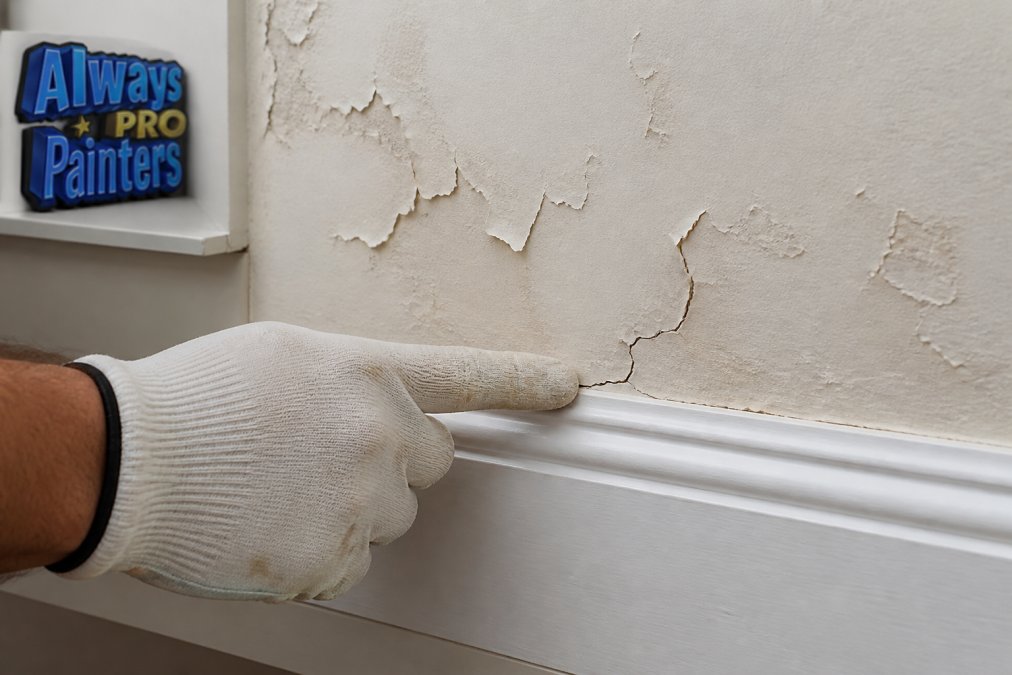
Poor prep often looks fine at first. Problems emerge weeks or months later, after the contractor is gone. Asking about prep process before hiring matters more than looking at finished photos.
Best Tools for Wall Surface Preparation Professionals Should Use
Professional prep work requires specific tools. A contractor who shows up with only a bucket of paint and a roller is signaling their process before they've said a word.
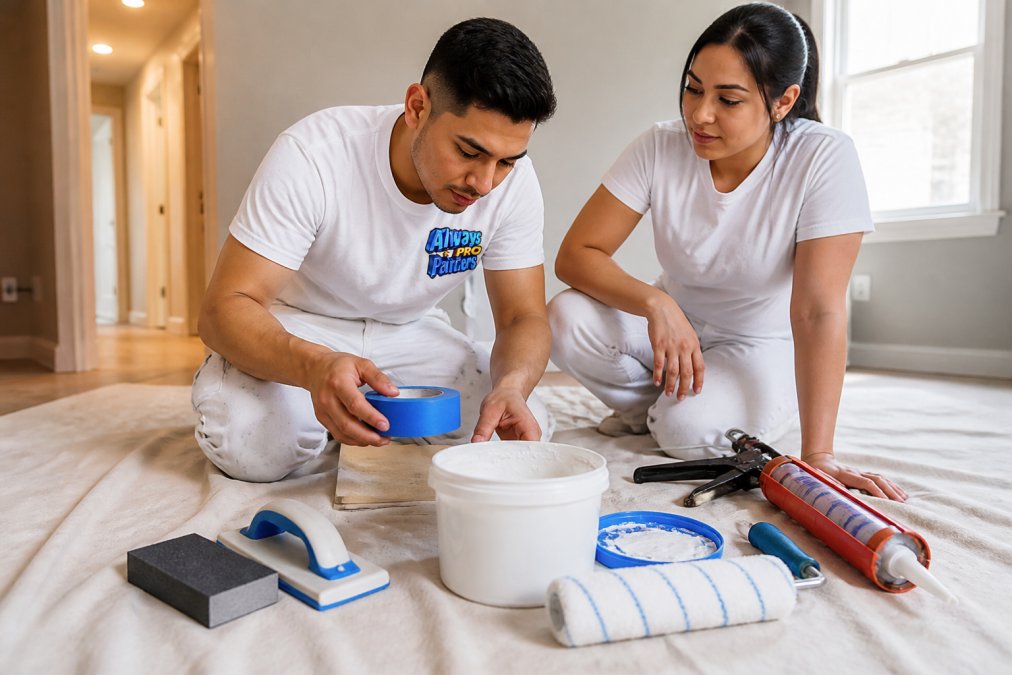
The core toolkit for proper wall surface preparation includes:
- Sanding blocks and sanding sponges for feathering edges on patched areas
- Electric orbital sanders for larger flat surfaces and previously painted walls
- Drywall patching compound for filling holes, cracks, and surface defects
- Caulking gun with paintable caulk for sealing gaps at trim, baseboards, and window frames
- Stain-blocking primer for covering water stains, smoke damage, or tannin bleed
- Painter's tape for masking trim, outlets, and adjacent surfaces
- Canvas drop cloths to protect flooring and furniture
- Moisture meter for testing substrates before applying primer or topcoat
Why Specific Prep Materials Matter for Paint Adhesion and Durability
Every material in that list exists for a reason. Stain-blocking primer isn't interchangeable with standard primer, it chemically prevents tannins, water stains, and smoke residue from bleeding through the topcoat. Paintable caulk at trim lines prevents micro-gaps from becoming cracks that grow over time. Canvas drop cloths absorb paint drips and stay in place, unlike plastic sheeting.
According to the Paint Quality Institute's guidance on surface preparation, proper surface preparation is the single most critical factor in paint job longevity. A well-prepared surface allows paint to achieve its rated durability; a poorly prepared one can cut that lifespan in half.
Painting Contractor Prep Work Checklist: DIY vs. Pro Comparison
The painting contractor prep work checklist differs based on who's doing the work:
| Prep Task | DIY Approach | Professional Approach |
|---|---|---|
| Surface cleaning | Wipe with damp cloth | Degreasing solution, full wash, dry time |
| Crack repair | Spackling paste, single coat | Drywall patching compound, multiple coats, sand flush |
| Sanding | Hand sanding high spots | Orbital sander, sanding blocks, full feathering |
| Priming | One coat standard primer | Stain-blocking where needed, full coverage, dry time |
| Caulking | Trim lines only | All gaps, corners, penetrations, trim, and crown |
| Masking | Painter's tape on trim | Full masking of floors, furniture, outlets, fixtures |
| Moisture testing | Rarely done | Moisture meter on suspect substrates |
| Wood rot repair | Skipped or painted over | Cut out, replace, prime with epoxy consolidant |
The gap isn't just skill, it's time. Professional prep takes significantly longer than most homeowners expect.
What a Professional Prep Walkthrough Should Include
Before any paint is mixed, a qualified contractor should walk the project space and document specific conditions. A professional prep walkthrough assesses surface defects, moisture risk, substrate type, and specialty requirements like stain blocking or wood rot repair.
What to expect:
- Wall inspection for cracks, holes, nail pops, and surface defects
- Trim and millwork assessment for gaps, peeling, and areas needing caulking
- Moisture check in bathrooms, kitchens, and basements
- Sheen and substrate identification to determine primer type
- Furniture and flooring protection plan
- Stain and bleed-through identification for stain-blocking primer needs
If a contractor skips this walkthrough, they're estimating blind.
How Long Does Professional Painting Prep Take?
Professional painting prep takes longer than most homeowners expect. For a standard interior room, surface preparation typically runs one to two days before any paint is applied.
General breakdown by task:
- Surface cleaning and degreasing: 2-4 hours per room
- Drywall patching and crack repair: 1-2 days including cure time
- Sanding: 2-6 hours per room
- Caulking and masking: 3-6 hours for a standard room
- Priming: 4-8 hours including dry time
A contractor who quotes a three-day full-interior project for a 2,000-square-foot home is almost certainly compressing prep steps. Quality prep realistically takes three to five days before the first topcoat.
As noted in the EPA's guidance on lead paint and renovation safety, homes built before 1978 require additional testing and preparation protocols before any sanding begins, a step that adds time but is legally required.
How to Choose a Painting Company With Detailed Prep Work Standards
Choosing a painting company with detailed prep standards requires asking better questions than most homeowners think to ask. Finished photos don't reveal prep quality. You need to get into the process.
A qualified contractor should explain their prep sequence without hesitation, know what primer they use and why, and have clear answers for moisture, stains, and wood rot. Vague answers to specific process questions are a red flag.
According to the Better Business Bureau's guide to hiring contractors, homeowners should request a written scope of work itemizing prep steps separately from paint application before signing any contract.
Questions to Ask During an In-Home Estimate
Use the in-home estimate to evaluate prep standards before committing.
Ask these specific questions:
- "What prep steps do you include before priming?" A strong answer covers cleaning, patching, sanding, and caulking.
- "What primer do you use, and why?" They should distinguish between standard and stain-blocking primer.
- "How do you handle existing cracks or nail pops?" The answer should include drywall patching compound, dry time, and sanding.
- "How do you protect floors and furniture?" Canvas drop cloths, not plastic sheeting, is correct.
- "Do you do moisture testing before priming?" On exterior walls, bathrooms, and basements, the answer should be yes.
- "Can I see photos from a recent project showing your prep work?" A confident contractor will have these.
Visual Evidence of Prep Work: What to Ask to See
Most contractors show finished photos. Ask for before and during photos instead. Visual evidence includes photographs of patched and sanded walls before priming, masked trim lines before paint application, and drop cloth coverage. A contractor who documents this process demonstrates that prep is a defined, consistent part of their workflow.
At Always Pro Painters, documentation of prep work is part of the project process. The final walkthrough exists because details of prep, clean lines, and solid finish should be verifiable, not just promised.
What Detailed Prep Work Costs You, and What Skipping It Costs More
Detailed prep work increases upfront project cost. A contractor who invests two days in surface preparation before touching a brush is charging for that time, and that labor is real.
What skipping prep costs is harder to see at estimate time. Paint that fails adhesion requires a full repaint. Cracks that weren't patched properly reopen within a year. Moisture that wasn't addressed before priming leads to bubbling and peeling requiring stripping back to bare substrate.
The cost of proper prep is paid once. The cost of skipping it is paid repeatedly.
For homeowners preparing a property for sale, this math is direct. A paint job showing surface defects or uneven sheen will be noticed during showings. A paint job built on proper surface preparation holds up under scrutiny.
For pricing specifics on what a detailed prep-included paint job costs for your project, contact Always Pro Painters directly for a free estimate. Every quote includes a full breakdown of prep steps, materials, and labor.
As the National Association of Realtors' guide to pre-sale home improvements documents, fresh interior paint consistently ranks among the highest-return pre-sale investments, but only when the finish quality holds up to buyer inspection.
Frequently Asked Questions
What prep work should a professional painting company do before painting?
A thorough painting company should clean and degrease all surfaces, repair cracks and holes with drywall patching compound, sand rough areas smooth, apply caulking around trim and gaps, and prime the substrate before any topcoat goes on. Furniture and flooring should be protected with drop cloths, and masking or painter's tape should be applied for clean lines. Skipping any of these steps shortens paint longevity and leaves visible surface defects once the paint dries.
How can I tell if a painting contractor is skipping prep work?
Watch for these signs: the crew starts painting within an hour of arriving with no sanding or patching, no drop cloths are laid down, cracks and nail holes are still visible before paint goes on, and no primer is applied to repaired areas or bare substrate. After the job, peeling edges, bubbling near patched spots, and uneven sheen are clear indicators that surface preparation was rushed or skipped entirely.
Does detailed prep work increase the longevity of an interior paint job?
Yes, significantly. Paint applied to a properly prepared surface, cleaned, sanded, primed, and free of surface defects, adheres far better than paint applied over dirty or uneven substrate. Proper preparation reduces the risk of peeling, cracking, and early fading. A well-prepped paint job can last several years longer than one where preparation was cut short, making the upfront investment in thorough prep work cost-effective over time.
What is the difference between standard and premium surface preparation?
Standard prep typically covers basic cleaning, light sanding, and spot-priming obvious damage. Premium preparation goes further: full degreasing, moisture testing, wood rot repair, stain blocking on problem areas, complete crack repair and drywall patching, full priming of all surfaces, and careful masking for clean lines throughout. Premium prep is what separates a professional finish that holds up for years from a paint job that starts showing wear within months.
Prep work is the part of painting that most contractors want to rush past. Always Pro Painters is built around the opposite approach: a clean foundation for paint, detailed surface preparation, and a final walkthrough to confirm every detail meets the standard before we leave. If you're ready to see what a prep-first process looks like on your project, request a free estimate and we'll walk through every surface with you before a single drop of paint is mixed.
This article was written using GrandRanker