 how-to
Why You Should Prime Walls Before Painting
Table of Contents
- Why You Should Prime Walls Before Painting
- When to Use Primer Before Painting
- Choosing the Right Primer for Your Walls
- How to Prime a Wall for Painting
- How Many Coats of Primer on Walls
- How Long Does Primer Take to Dry Before Painting
- The Cost and Time Trade-Offs of Priming
- Conclusion
- Frequently Asked Questions
Last Updated: October 9, 2026
Why You Should Prime Walls Before Painting
Most homeowners want to skip straight to color.
Primer is a preparatory coating applied to walls before paint to seal the surface, block stains, and help the topcoat bond properly. It is not a cheaper version of paint.
Here is what we cover below:
- What primer actually does to a wall
- When primer is necessary and when you can skip it
- How to pick the right primer for your surface
- The real cost and time trade-offs
The U.S. Environmental Protection Agency's indoor air quality guidance is a good starting point if you are choosing products for a room you sleep or work in.
What Primer Actually Does
Primer solves three problems that paint alone cannot fix.
First, it seals. Drywall and bare wood soak up paint like a sponge, pulling moisture and resin out of the topcoat and leaving dull, uneven patches.
Second, it sticks. A sealed, slightly textured primer coat gives the topcoat something to grab; bare or glossy walls give it almost nothing.
Third, it blocks. Primer traps stains and odors inside the film so they cannot work their way up through your new color.
Paint does none of these jobs well on its own.
The Real Benefits of Priming
The payoff shows up in four places:
- Better paint adhesion means less peeling and flaking down the road
- Sealed walls mean even coverage instead of blotchy absorption
- Stain and odor blocking keeps old marks and smells from returning
- Fewer topcoats are often needed over a primed surface
A smooth finish starts under the color, not in it.
When to Use Primer Before Painting
Knowing when to use primer before painting saves you money on jobs that do not need it and saves your finish on jobs that do.
When Primer Is Necessary
Prime in these situations:
- Painting new walls or bare drywall that has never been coated
- Making a major color change, like dark to light
- Covering previously painted walls that were finished with oil-based paint
- Painting over stains from water, smoke, ink, or markers
When You Can Skip Primer
You can often skip primer when all of these are true:
- The wall is already painted and in good condition
- You are repainting in a similar or lighter shade
- The existing finish is clean, matte, and sound
- You are using a paint-and-primer-in-one product on a sound surface
Even then, spot-prime any patches or bare spots first.
| Wall Condition | Prime? | Why |
|---|---|---|
| New or bare drywall | Yes | Seals porous surface |
| Major color change | Yes | Blocks old color |
| Oil-based paint underneath | Yes | Helps new paint bond |
| Stains or odors | Yes | Blocks bleed-through |
| Sound, similar-color repaint | Usually no | Surface is ready |
| Patched or repaired areas | Spot-prime | Seals fresh material |
Choosing the Right Primer for Your Walls
Match the primer to the surface and the problem, not the paint color. The wrong primer can fail to bond, lift the existing coating, or leave you repainting the same wall twice.
Primer Types and What They Are For
- Water-based (latex) primer: the default for most interior walls. Low odor, dries in about an hour, cleans up with soap and water. Best for bare drywall, previously painted walls in good condition, and similar-color repaints. It will not block heavy stains or seal glossy surfaces well.
- Oil-based primer: the workhorse for stain blocking, odor sealing, and tough bonding, and it penetrates chalky or slick surfaces better than water-based products. Trade-offs: strong fumes, overnight dry time, and mineral-spirit cleanup. It is also right when the wall underneath is oil-based paint and you plan to topcoat with latex.
- Bonding primer: for glossy, slick, or hard-to-stick surfaces such as cured enamel, laminate, and some factory finishes. It creates a mechanical tooth the topcoat can grab when sanding alone has not dulled the surface enough.
- Stain-blocking primer: shellac- or oil-based products that trap water marks, smoke residue, ink, marker, and pet stains inside the film. Shellac dries fast and blocks the widest range of stains; oil-based is slower but easier on large walls.
Matching Primer to Surface and Problem
| Surface or Problem | Best Primer Type | Why |
|---|---|---|
| New bare drywall | PVA or drywall primer | Seals paper and joint compound evenly |
| Previously painted, sound | Water-based | Bonds to a clean, dull surface |
| Glossy or slick finish | Bonding primer | Creates tooth for the topcoat |
| Water, smoke, or ink stains | Shellac or oil-based stain blocker | Traps stain in the film |
| Pet or smoke odor | Oil-based or shellac | Seals odor molecules |
| Oil-based paint underneath | Oil-based or bonding | Compatible bond with latex topcoat |
| Chalky or powdery surface | Oil-based | Penetrates and consolidates |
Compatibility Cautions
- Do not apply water-based primer over a chalky or peeling oil-based coating without sanding first. The primer can lift the old film.
- Shellac-based stain blockers are alcohol-thinned and will dissolve some existing coatings. Spot-test in an inconspicuous area first.
- Latex topcoat over oil-based primer is fine once the primer is fully cured. Oil topcoat over water-based primer is not recommended.
- Do not mix primer brands or types in the same can. Additives can be incompatible and cause curdling or poor curing.
- Check the label for the recoat window. Some primers must be topcoated within a set time, or they need a light sanding first.
If you are unsure, ask at the paint counter and describe the wall, not the color. Bring a photo of the surface and the existing paint can if you have it.
How to Prime a Wall for Painting
Here is how to prime a wall for painting, step by step.
Total Time: 4-6 hours for an average room, plus dry time Difficulty: Beginner to intermediate
What You'll Need:
- Primer suited to your surface
- Roller with a 3/8-inch nap cover
- Angled brush for edges and trim
- Painter's tape and drop cloths
- Sanding block and patching compound
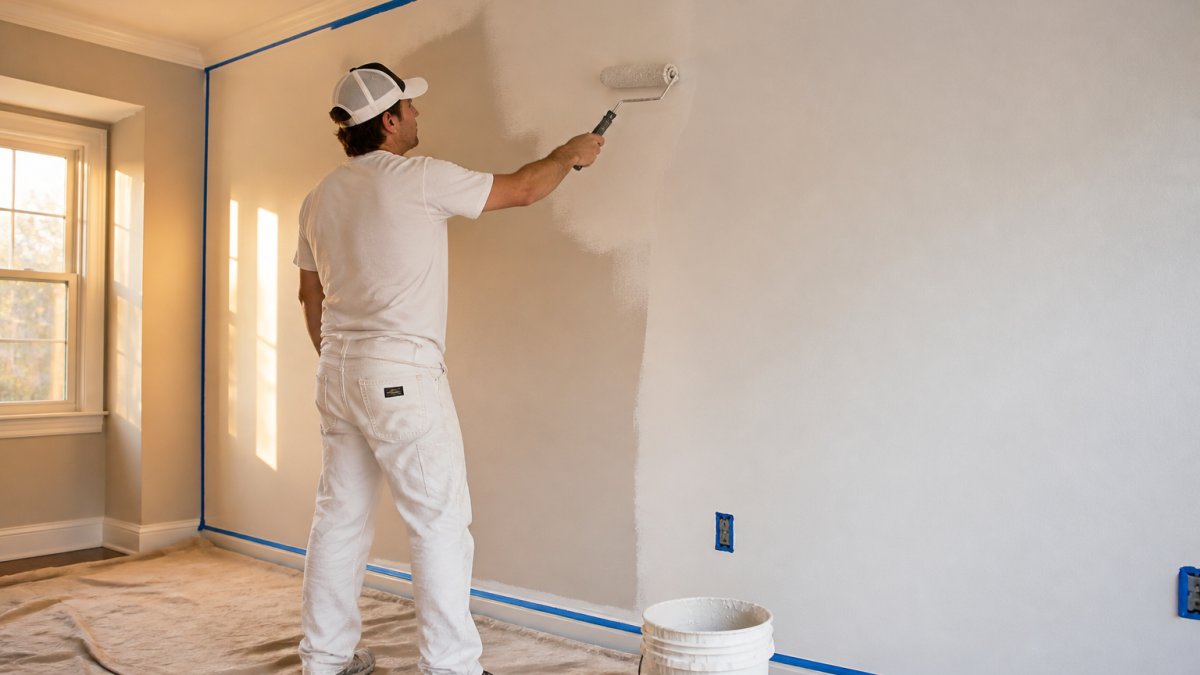
- Prep the room. Move furniture, lay drop cloths, and tape off trim and outlets.
- Repair the wall. Fill holes and cracks, then sand smooth. Wipe away dust.
- Clean the surface. Remove grease, grime, and any glossy residue.
- Spot-prime repairs. Seal patched and bare areas first.
- Cut in the edges. Brush a 2-3 inch band along trim, corners, and the ceiling line.
- Roll the field. Work in a W pattern, then fill it in without overloading the roller.
- Let it dry fully. Follow the label, not the clock on your phone.
- Check the coverage. Spot-prime any thin or missed areas.
Common Priming Mistakes to Avoid
- Rolling primer on too thick, which causes drips and uneven drying
- Skipping the spot-prime on patches and bare spots
- Priming over a dirty or greasy wall
- Using the wrong primer for the surface
- Painting the topcoat before the primer is fully dry
How Many Coats of Primer on Walls
One coat of primer is enough for most interior walls. Two coats make sense when covering a dark or saturated color, blocking a stubborn stain or odor, or sealing a very porous surface that drinks up the first coat. If the first coat still shows the old color or texture, add a second; if the wall looks evenly sealed and dry, move on to paint.
How Long Does Primer Take to Dry Before Painting
Most water-based primers dry to the touch in about an hour and are ready for a topcoat in two to four hours. Oil-based primers take longer, often overnight. Dry time depends on humidity, airflow, and how thick you applied it; cool, damp rooms slow everything down.
A good rule is to read the label, then add a cushion. If the primer feels cool or tacky, it is not ready.
The Cost and Time Trade-Offs of Priming
Priming adds a step, a product, and dry time. It also often removes a topcoat, because sealed walls cover in fewer passes. Whether that trade-off pays off depends on the wall, the color change, and how much rework you are trying to avoid.
What Priming Adds
- Product cost: a gallon of interior primer typically runs less than a gallon of quality wall paint, but it is still an added line item. For an average room, plan on roughly one gallon per coat.
- Labor time: rolling and cutting in a room usually adds two to four hours on top of the painting itself, plus prep and cleanup.
- Dry time: water-based primers need about two to four hours before topcoat; oil-based and shellac products often need overnight.
- Tools and cleanup: an extra roller cover, tray liner, and brush, plus cleanup time for oil-based products with mineral spirits.
What Priming Saves
- One fewer topcoat: on a major color change or a stained wall, primer often replaces the second or third coat of paint, one less gallon and one less drying cycle.
- Less rework: paint that peels, blisters, or bleeds through means sanding, re-priming, and repainting the same wall, the most expensive outcome of all.
- Better coverage per gallon: sealed walls do not pull resin and moisture out of the topcoat, so the paint goes further and looks more even.
- Longer service life: a properly bonded coating resists peeling and flaking longer, which delays the next repaint.
When the Trade-Off Favors Priming
- Major color change, especially dark to light
- Stained, smoked, or odorous walls
- Bare drywall, bare wood, or patched areas
- Glossy or slick surfaces that need a bonding coat
- Walls previously coated with oil-based paint
When the Trade-Off Favors Skipping
- Sound, clean, matte walls being repainted in a similar or lighter shade
- A paint-and-primer-in-one product on a surface that is already sealed
- Small touch-up areas where spot-priming is enough
A Simple Way to Think About It
Count the cost of the primer and the extra hour or two against one more gallon of paint and one more drying cycle. On a color change or a stained wall, primer usually wins.
For a professional job, pricing depends on wall condition, room count, and prep needed. We give free estimates so you know the scope before we start.
Conclusion
The hardest part of painting is not the color. It is the surface under it. Peeling, bleed-through, and patchy coverage almost always trace back to a skipped or rushed primer coat.
Always Pro Painters builds every job around detailed surface preparation, from drywall repairs to cabinet refinishing.
Get started with Always Pro Painters and a free estimate, and get a finish that holds up long after the last coat dries.
Frequently Asked Questions
Why should you prime walls before painting?
Priming walls before painting improves paint adhesion, seals porous surfaces, blocks stains and odors, and helps the topcoat cover evenly. It also reduces the number of topcoats needed, saving paint and time. Without primer, paint may peel, flake, or look uneven, especially over dark colors or glossy finishes.
Do you need to prime walls that are already painted?
It depends on the wall's condition. If the existing paint is in good shape, clean, and the same color family, you might skip primer. But if there are stains, repairs, or a major color change, primer is necessary. For previously painted walls with a glossy finish, sanding and priming ensure the new paint sticks.
How many coats of primer should you apply to a wall?
One coat of primer is usually enough for most walls. However, if you're covering a dark or saturated color, or if the wall is highly porous, two coats may be needed. Always follow the primer manufacturer's instructions for the best results.
How long does primer take to dry before painting?
Most water-based primers dry to the touch in 1 to 2 hours and can be topcoated after 2 to 4 hours. Oil-based primers may need 4 to 6 hours or more. Humidity and temperature affect drying time, so check the label and ensure the primer is fully dry before applying paint.